Don’t miss new content! Follow me:
Introduction
Update
I created a new sub-page that collects all content related this robot. Please check out my DIY Robotics Plattform page to make sure you do not miss anything!
Video Tutorial
Watch the video tutorial below to learn everything about this DIY smartphone robot for kids!
Jump to Chapter:
short Facts
Recommended age: kids of 10 years and older
Skill level electronics: medium
Skill level paper crafting: easy
Time needed: 2-3 hours
Estimated costs per robot: about 15 Euro or Dollar
Important: The smartphone robot is an upgrade to my easy robot. So kids can start with the basic robot and then upgrade it step by step.
Why Turn a Smartphone Into a DIY Robot?
If you buy something and it is not working, you hate the product. If you build something and it is not working, you try to fix it. That’s how you learn.
The mission
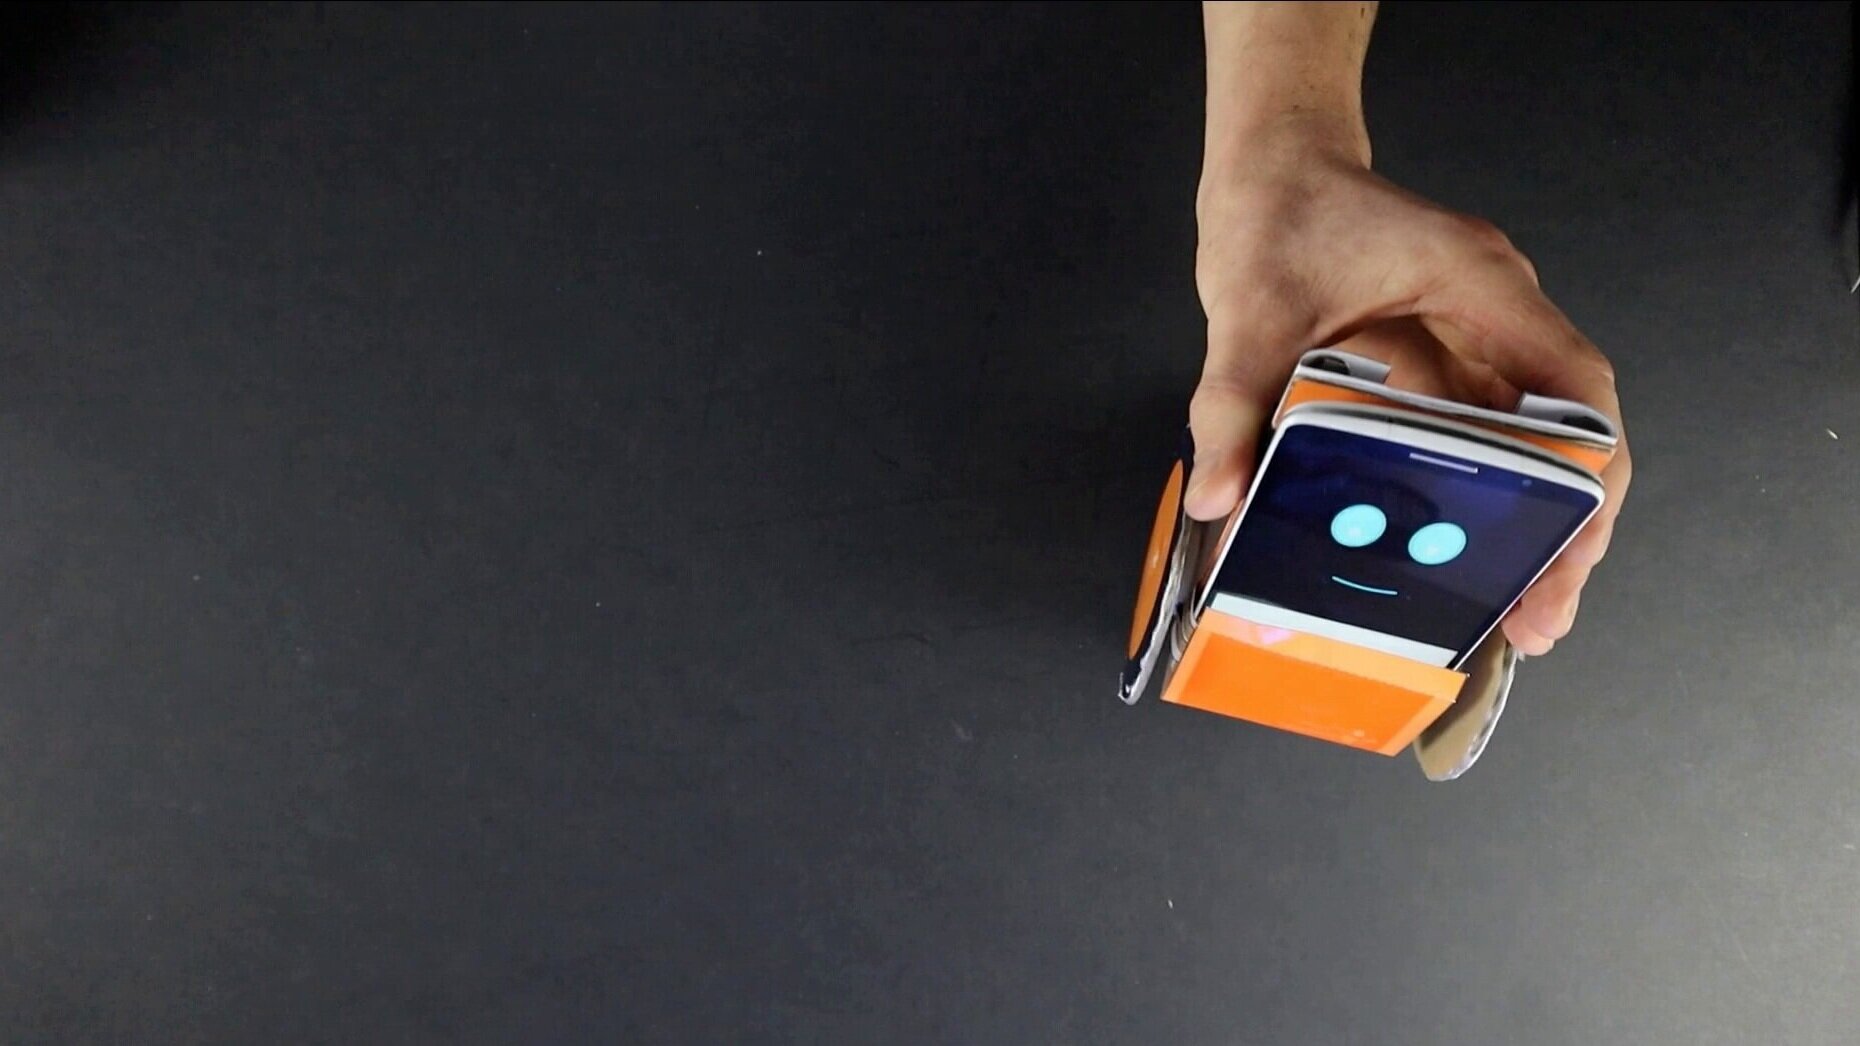
I invented this robot as a cheap and simple DIY alternative to expensive robotic toys and to inspire a maker mindset within kids. The goal was to use only super simple electronics, conductive tape, cardboard, and a smartphone as the robot's brain. There are no tools required! And the best thing is: Kids don‘t learn about programming a toy robot. They learn about app programming, which is a very useful skill for their future!
The Idea
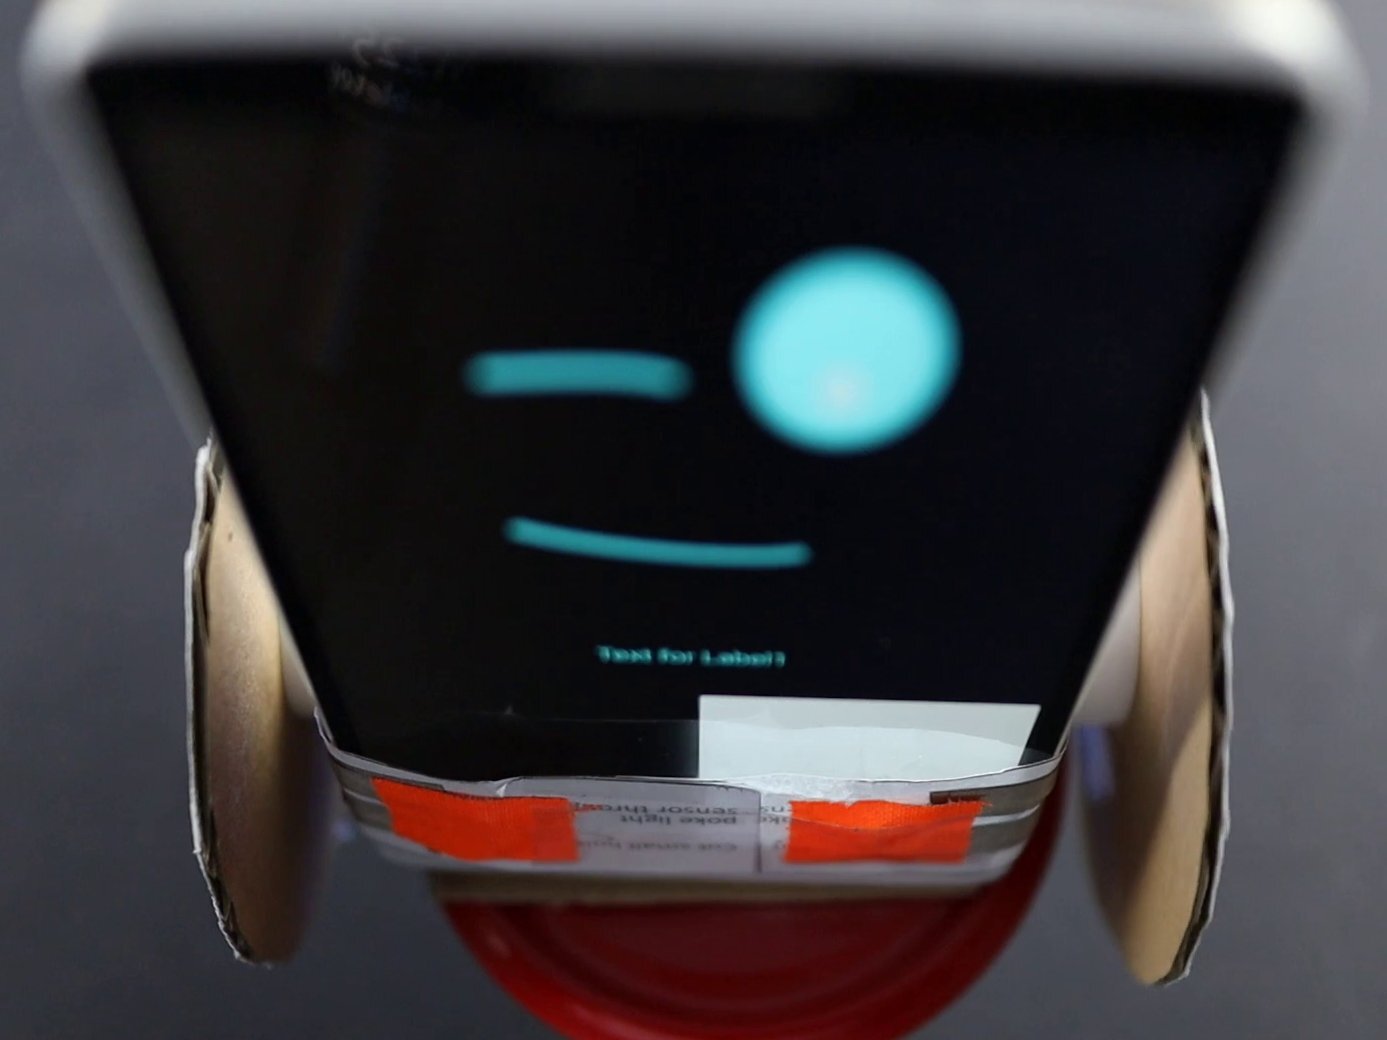
Light sensors (underneath orange tape) “reading” from smartphone screen
To have the “brain” communicate with the robot I use light sensors to “read” a light value (light or dark) from the display. To keep things simple I do not use any microcontroller to evaluate the readings from the sensors. I use simple transistors to control the motors of the robot. See my video above for further explanation.
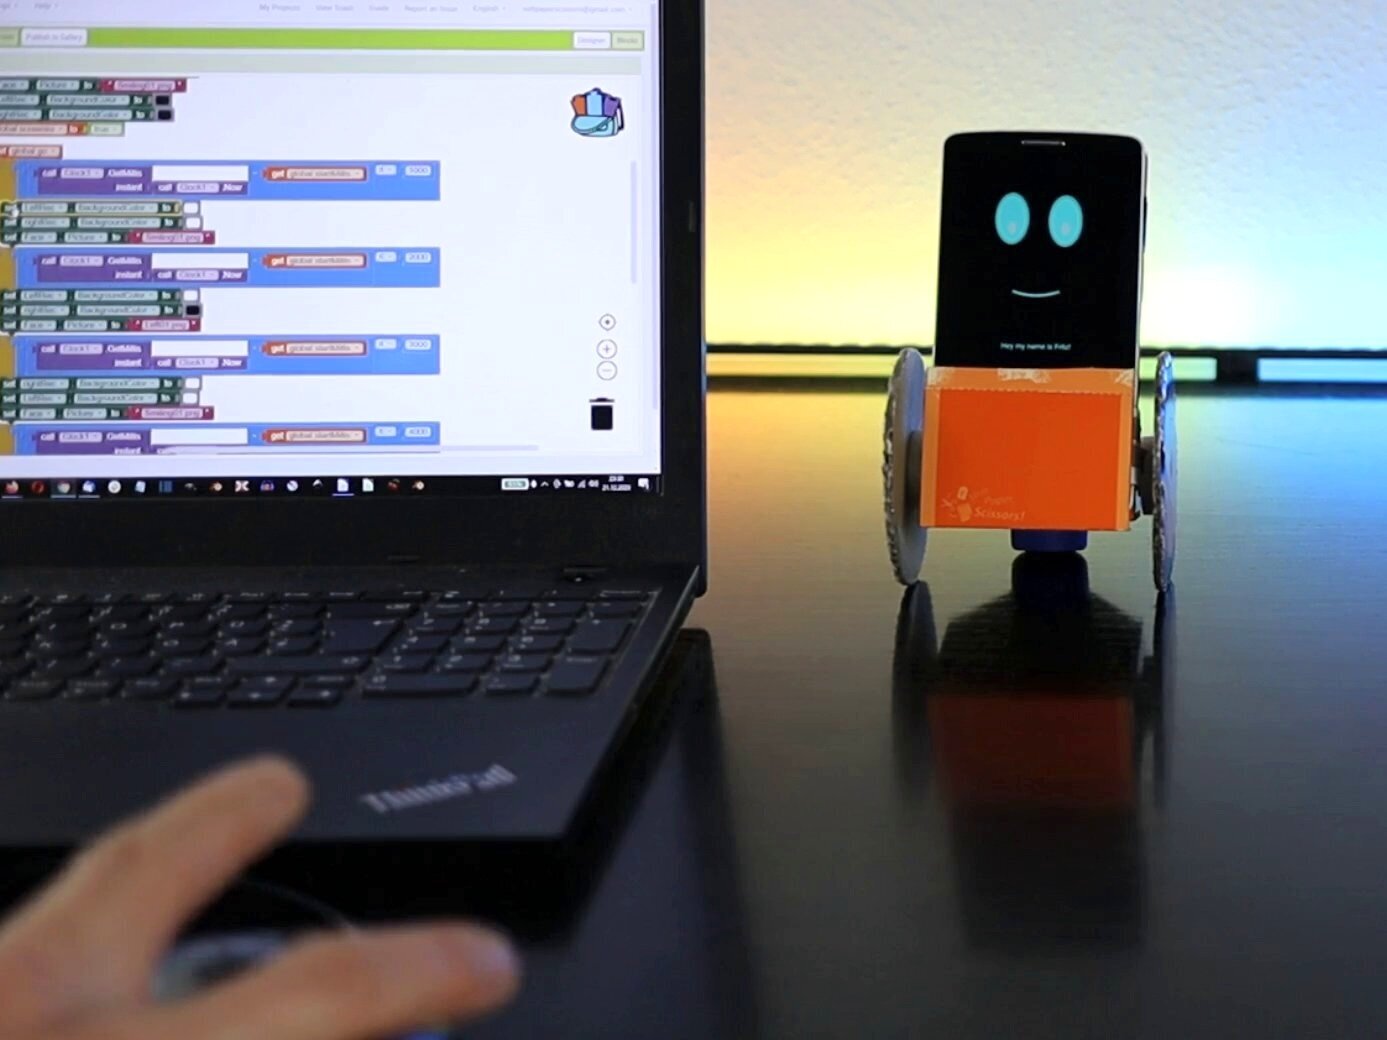
For programming the smartphone robot any programming language for apps can be used. I used MIT App Inventor, which is completely free to use and specifically designed to teach kids about app programming.
However…. Programming your robot can be even simpler, by just using a sequence of pictures. You will find more instructions about this further below.
The Robot
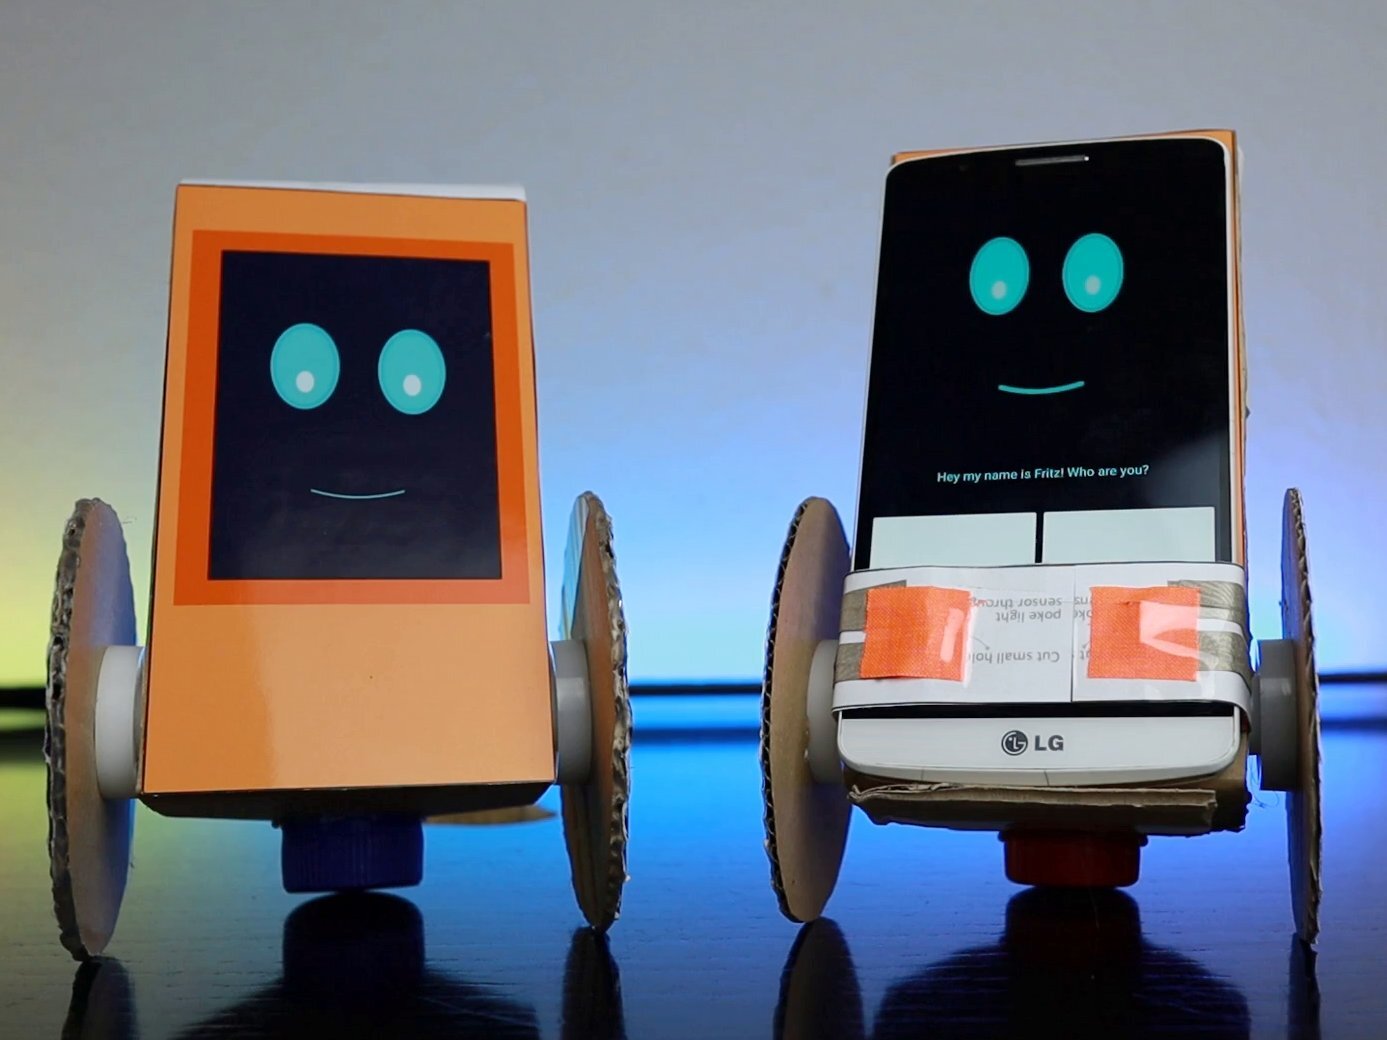
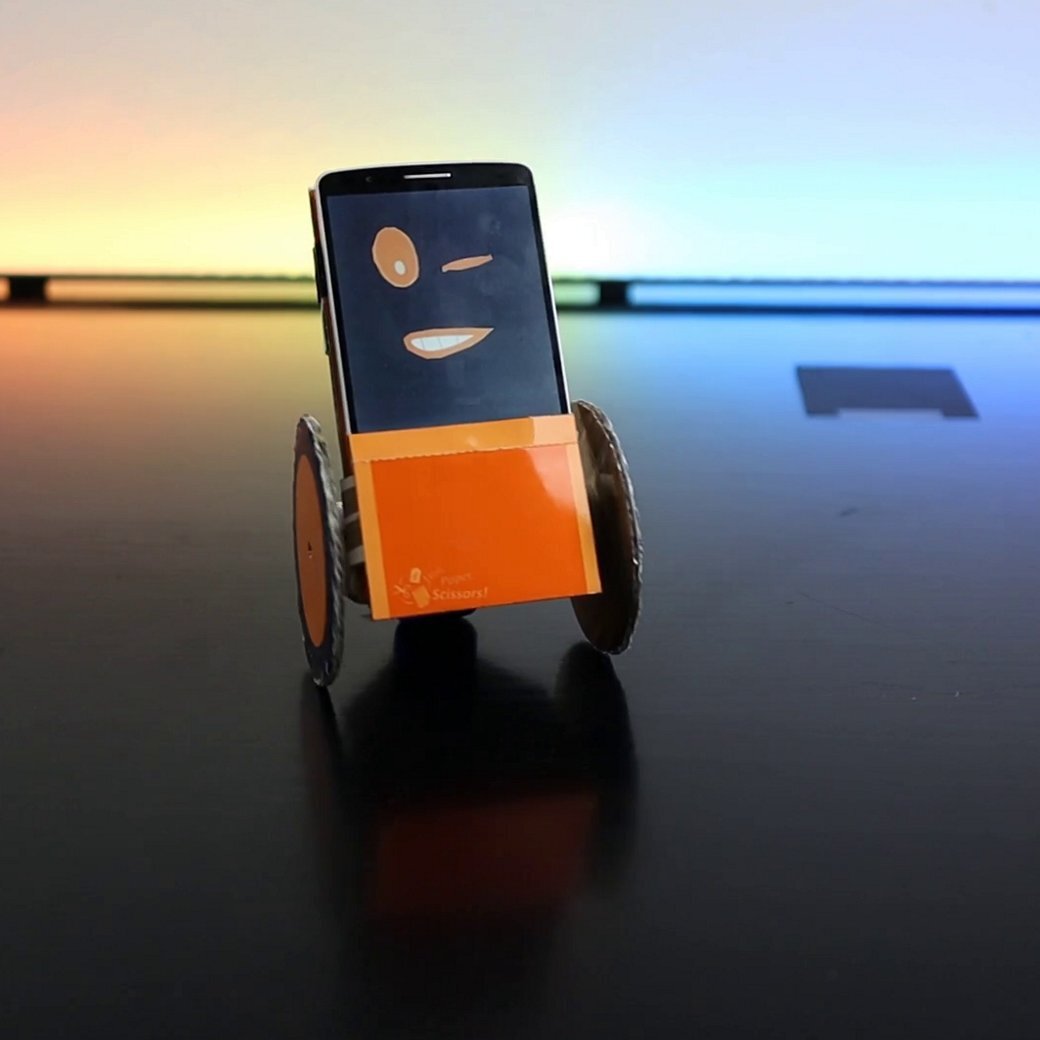
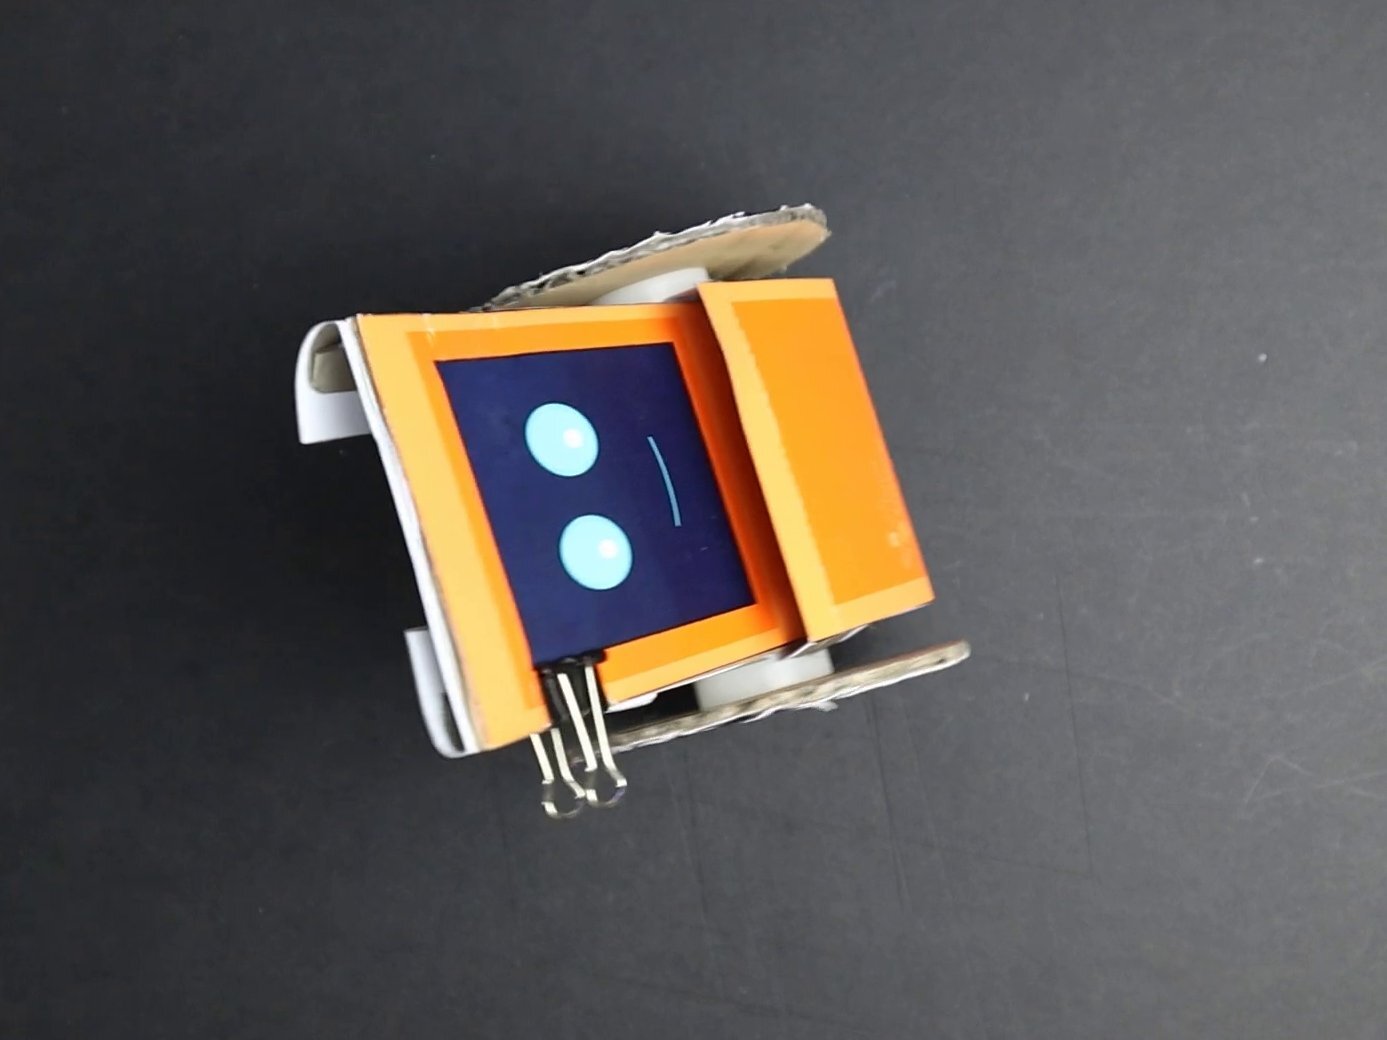
Using a smartphone as the robot's brain adds a whole world of complexity to your robot. The smartphone robot can:
… drive around, of course.
… show different facial expressions. Even animations are possible!
… say anything you want with the text-to-speech module.
… listen to voice commands with the integrated voice assistant.
... can be remotely controlled by another smartphone.
… can use the smartphone's compass, camera, flashlight, and much much more!
I have so many ideas, that I would like to make a whole series of videos showing you how to use MIT App Inventor to program this little robot.
Update: Maker Bot
The question I get asked the most is: "Is it possible to use standard DC (yellow) motors for this robot?" The answer is: YES, it is! But you have to change the other components for that as well!
I decided to make another version of this robot. This version uses standard maker materials like a breadboard and AA batteries. All the instructions you need are also included in the above download from my Teachers Pay Teachers store.
You can watch a video of the MakerBot here.
Explaining the DIY Smartphone Robot
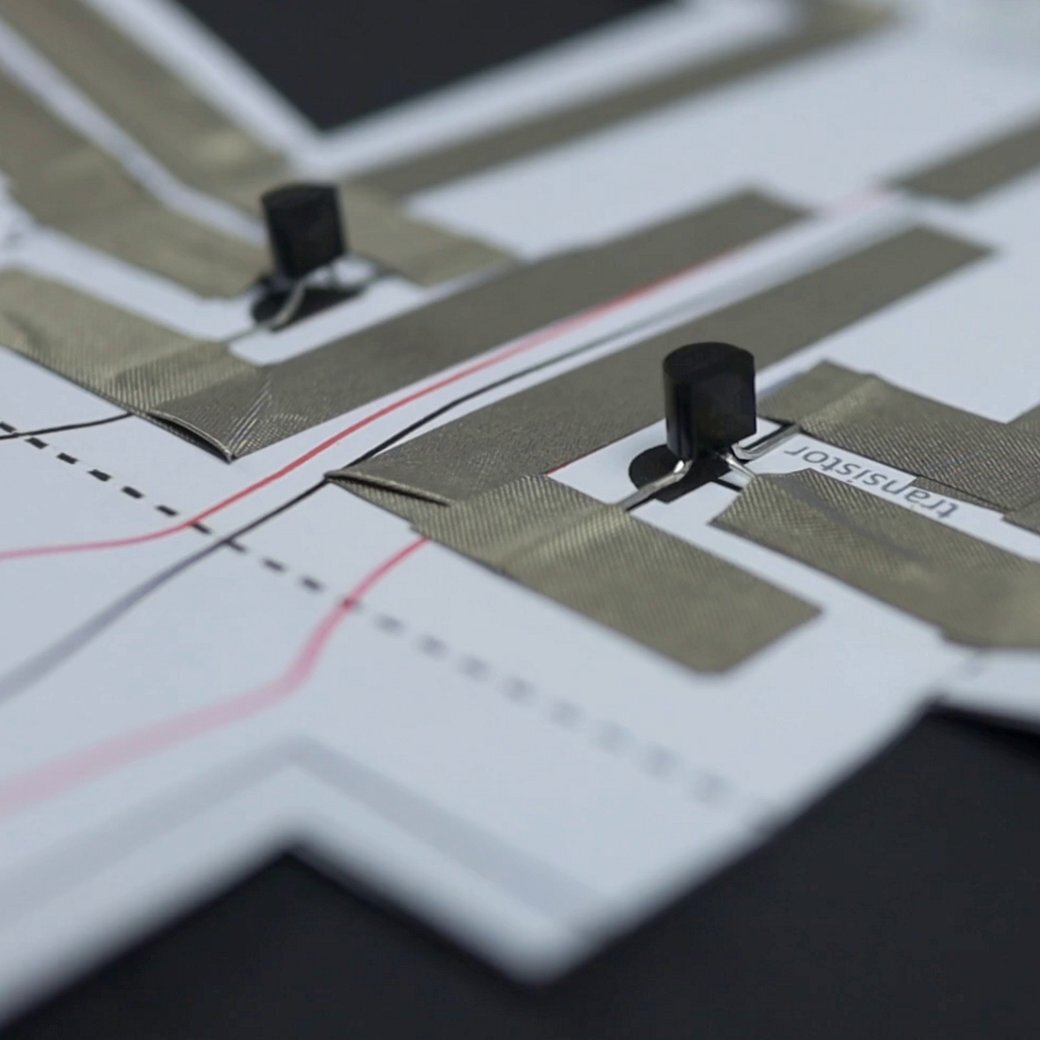
A simple paper circuit made from a transistor and a light sensor.
Please watch my video tutorial above to get a good overview on how the robots circuit works.
Light sensing Paper Circuit
Use my sample circuit template (free download) to explain the basic concepts to kids. Kids can easily experiment with the sample circuit to explore how it works.
Experiments might include:
Changing the black and red wire of the motor to make it rotate the other way.
Exchanging the motor with a buzzer or LED
Experimenting with the additional resistor (voltage divider) to change the threshold triggering the circuit.
Please refer to my materials list for everything you need for experimentation.
Additional Information
Here are some helpful links for the following topics:
Get Started - It’s Easy!
Visit my Teachers Pay Teachers store to download the following:
All the templates for the Easy Robot and the Smartphone Robot
A PDF tutorial for the MakerBot
A coding guide on how to use MIT App Inventor for Smartphone Robotics
My electronics shopping guide
And much more!
Included in every download
Templates
All my templates are tested and ready for printing (PDF). Use them for yourself, your children or for a group of kids in class.
Download a free sample of my Easy Circuit template here.
electronics shopping guide
Making this project is much easier when using the exact same conductive tape and electronic components. Use my shopping guide to order everything you need.
Looking for free downloads? This website has become more than just a hobby for me, so I have decided to charge a small fee for my templates.
Preparation
Collecting the electronics and materials.
Materials
the printed template
two geared solar motors (Solarbotics or Sol-Expert are great manufacturers)
two photo resistors (aka light sensors)
two NPN transistors
four button cells (CR2032)
two binder clips (19mm size or bigger)
conductive tape
craft supplies (glue, tape, scissors, toothpicks, bottle cap)
Not in picture:
cardboard
hot glue (optional but recommended)
Printing the Template
For this project you can print my templates on any kind of paper, e.g. normal printing paper.
left side: easy robot; right side: smartphone robot
Two ways to build your smartphone robot
I recommend that kids start building the easy robot first and then upgrade it.
If you want to build the smartphone robot right away you can do so by preparing the smartphone robot circuit as shown on this page and the chassis of the robot as shown in my easy robot tutorial. The process is very much the same!
For this tutorial I will assume that you have a working easy robot chassis that you can use!
Step-By-Step Tutorial
Build the robot and turn your smartphone into the robots brain!
Please watch my video tutorial at the top first. Then use the following instructions as a guide.
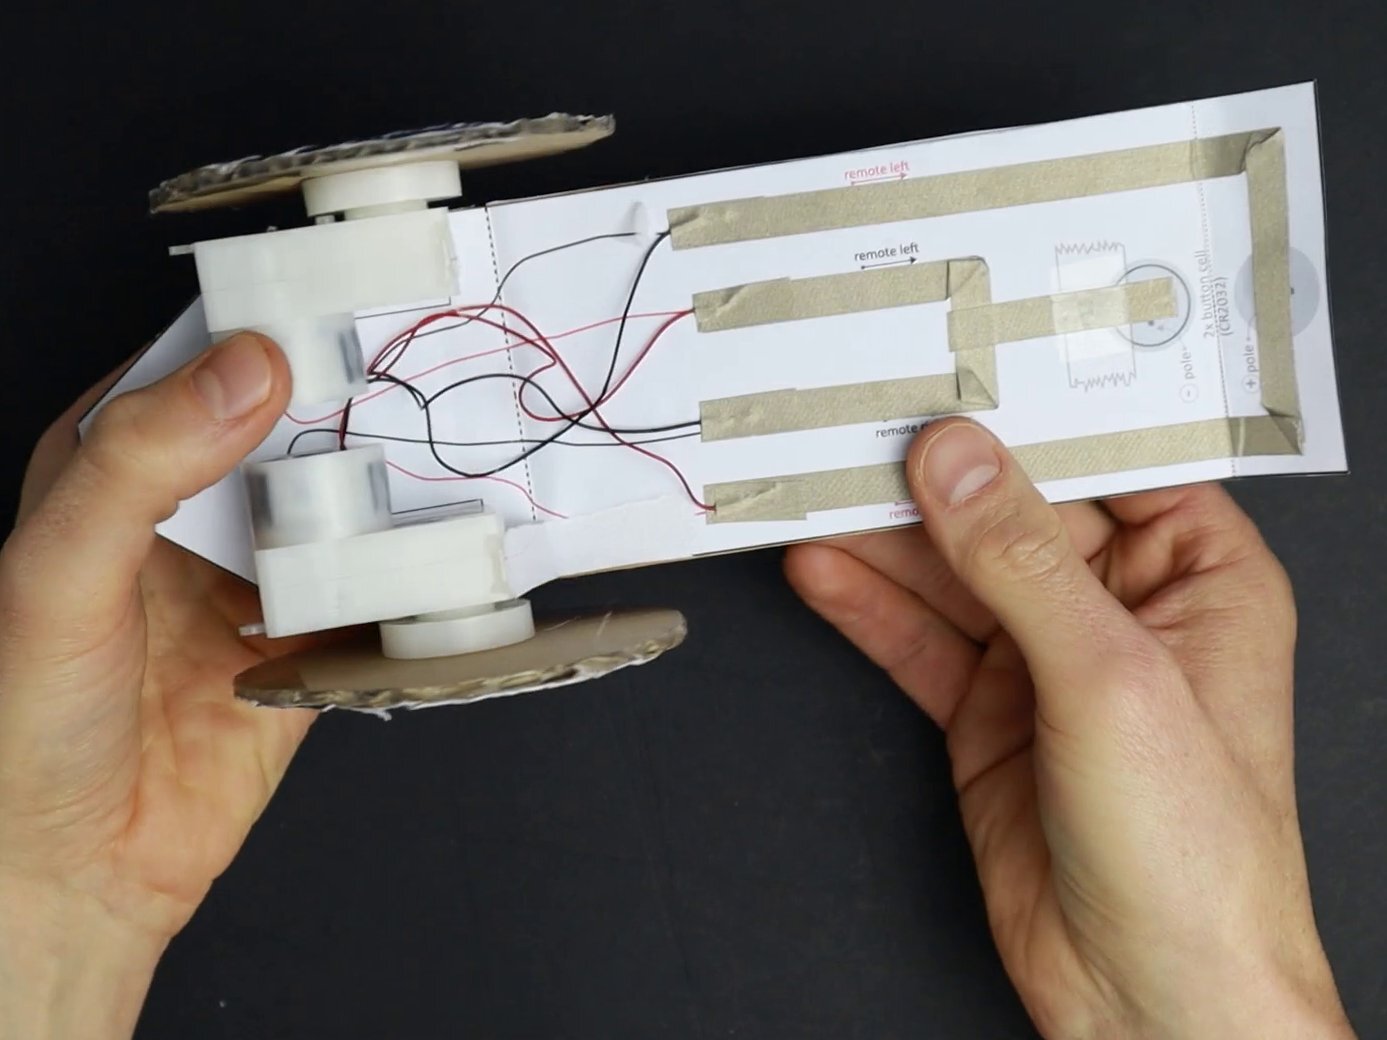
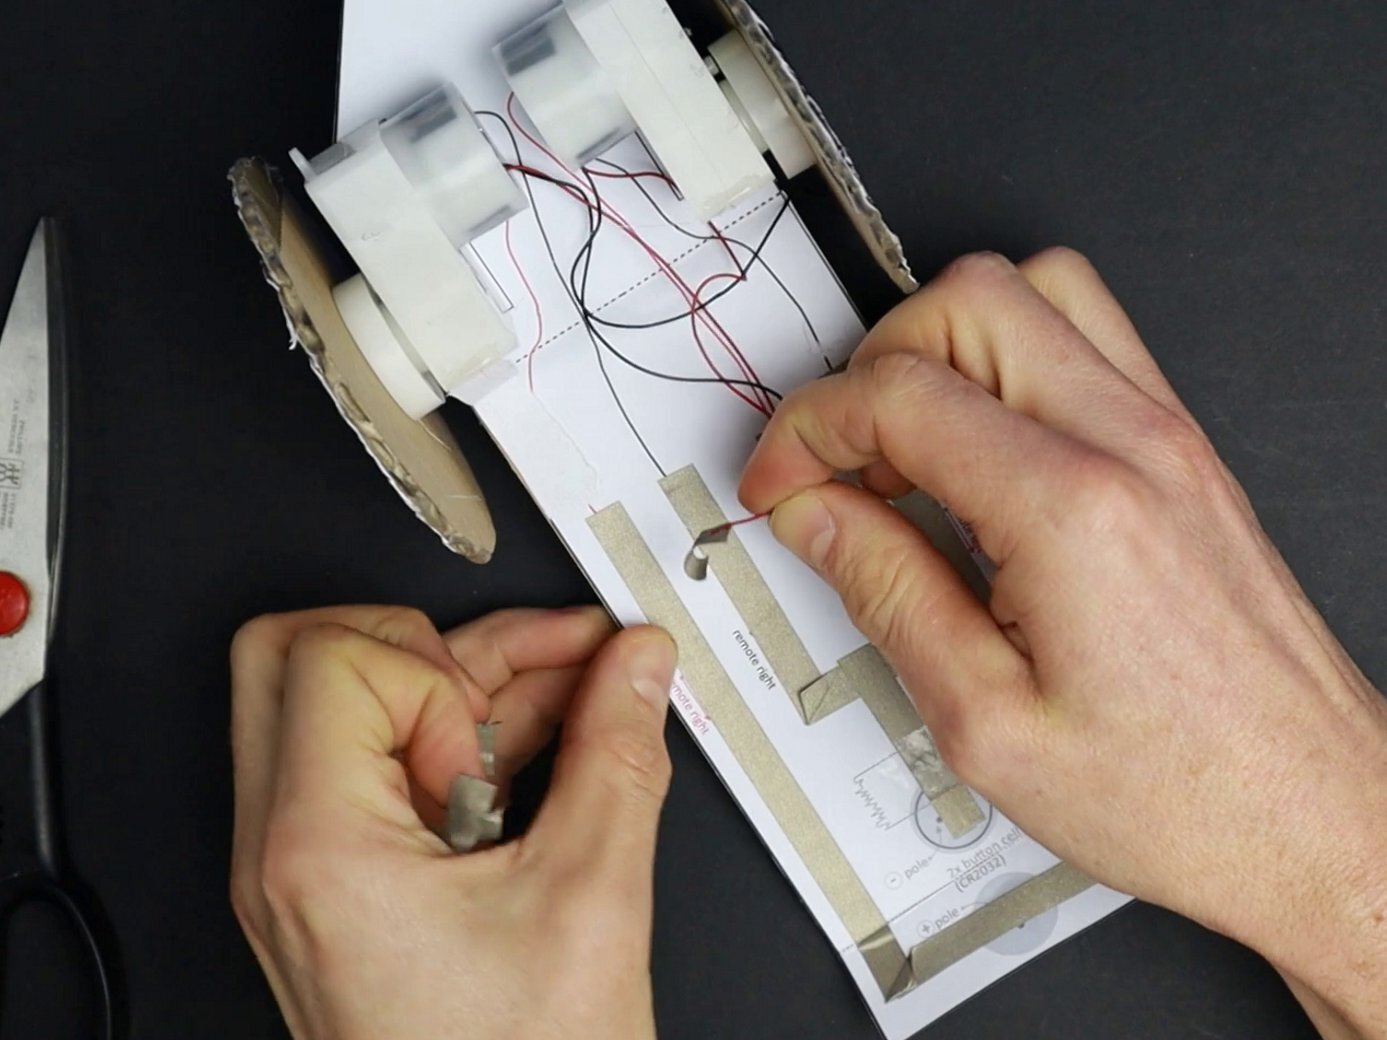
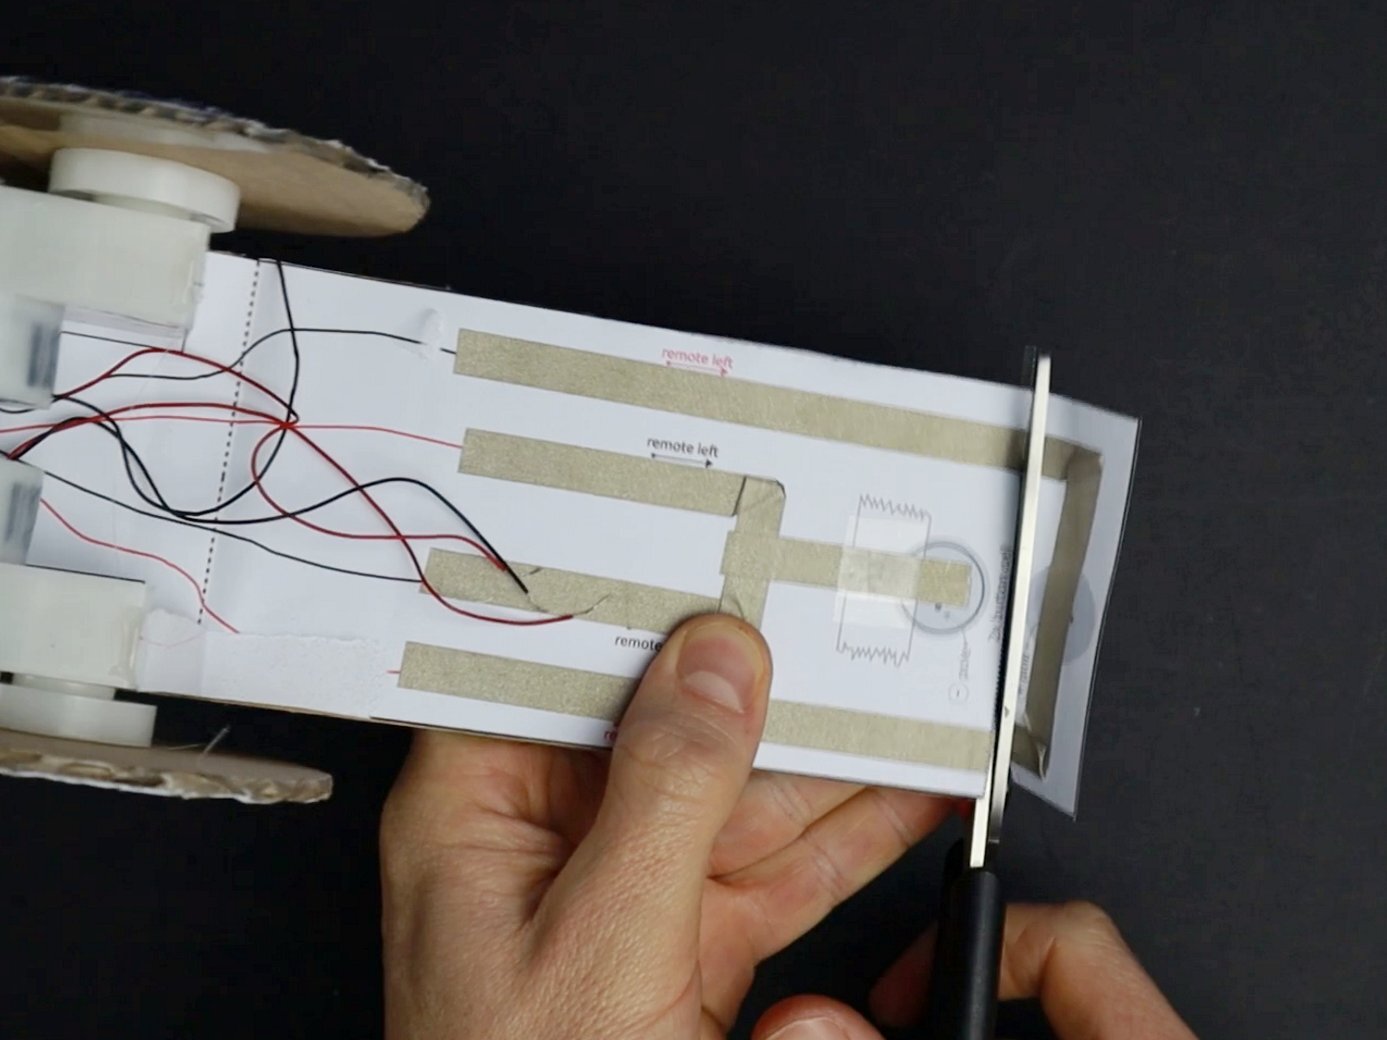
Step 1: Prepare the Basic Robot
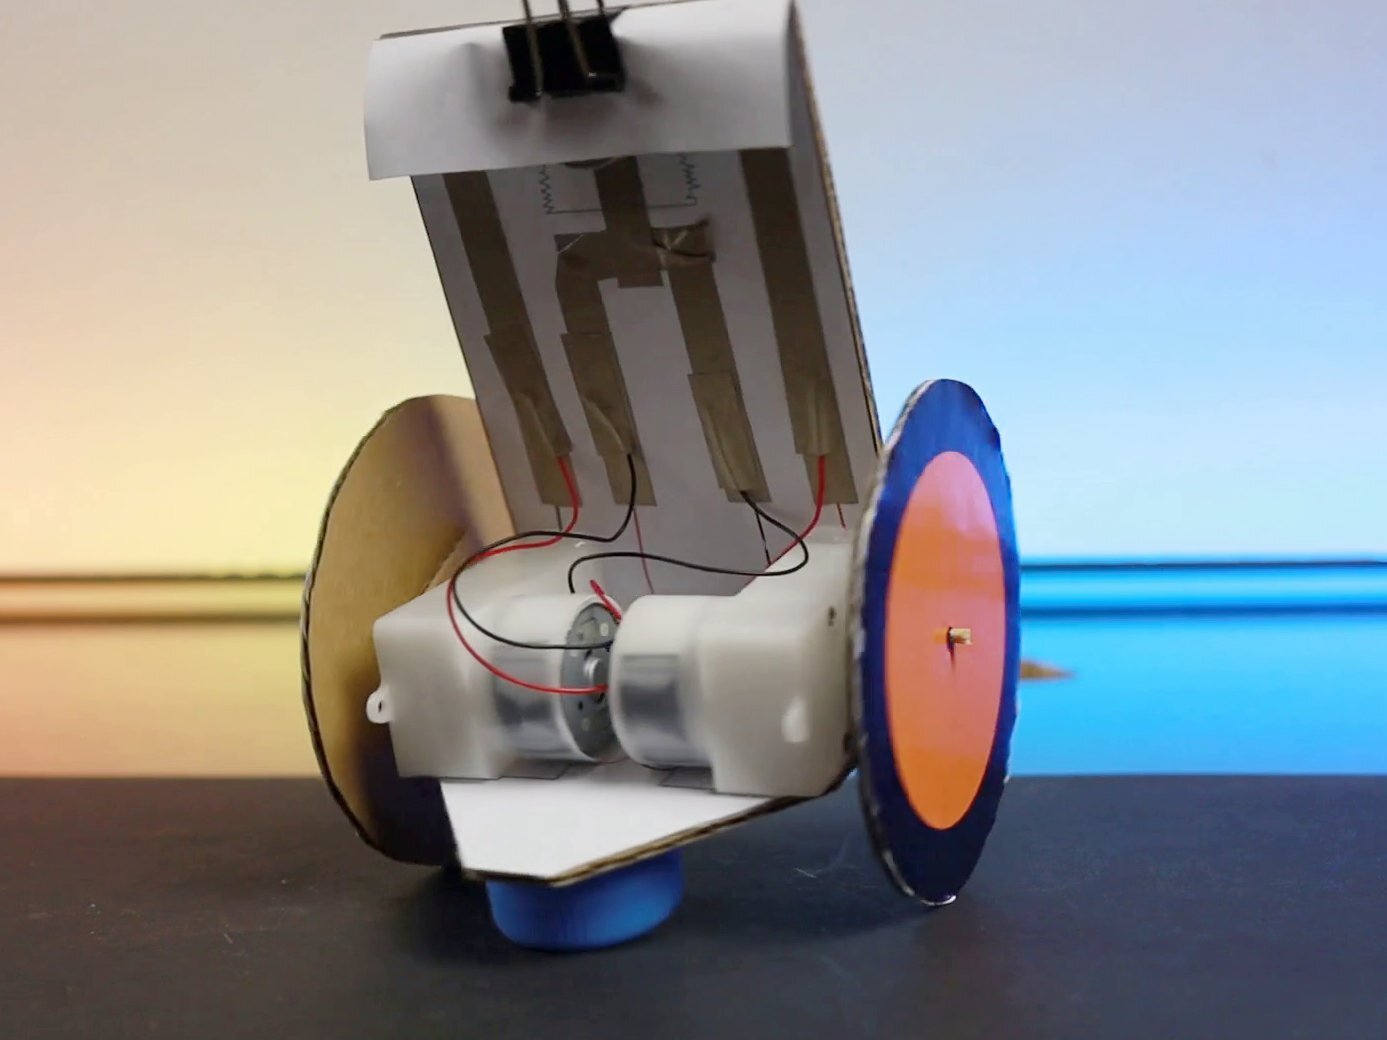
Follow my Easy Robot tutorial and then prepare the chassis of the robot like that:
Snap of the front cardboard from the motors.
Detach all motor wires from the paper circuit.
Cut the overlapping piece of the paper circuit (if it is still there).
Step 2: Prepare the (new) paper Circuit
If this is the first time working with conductive tape, please watch my paper circuit basics video first.
Cut and Fold the template
Cut out the template. Fold all folding edges. Then unfold again.
Trace the circuit tracks
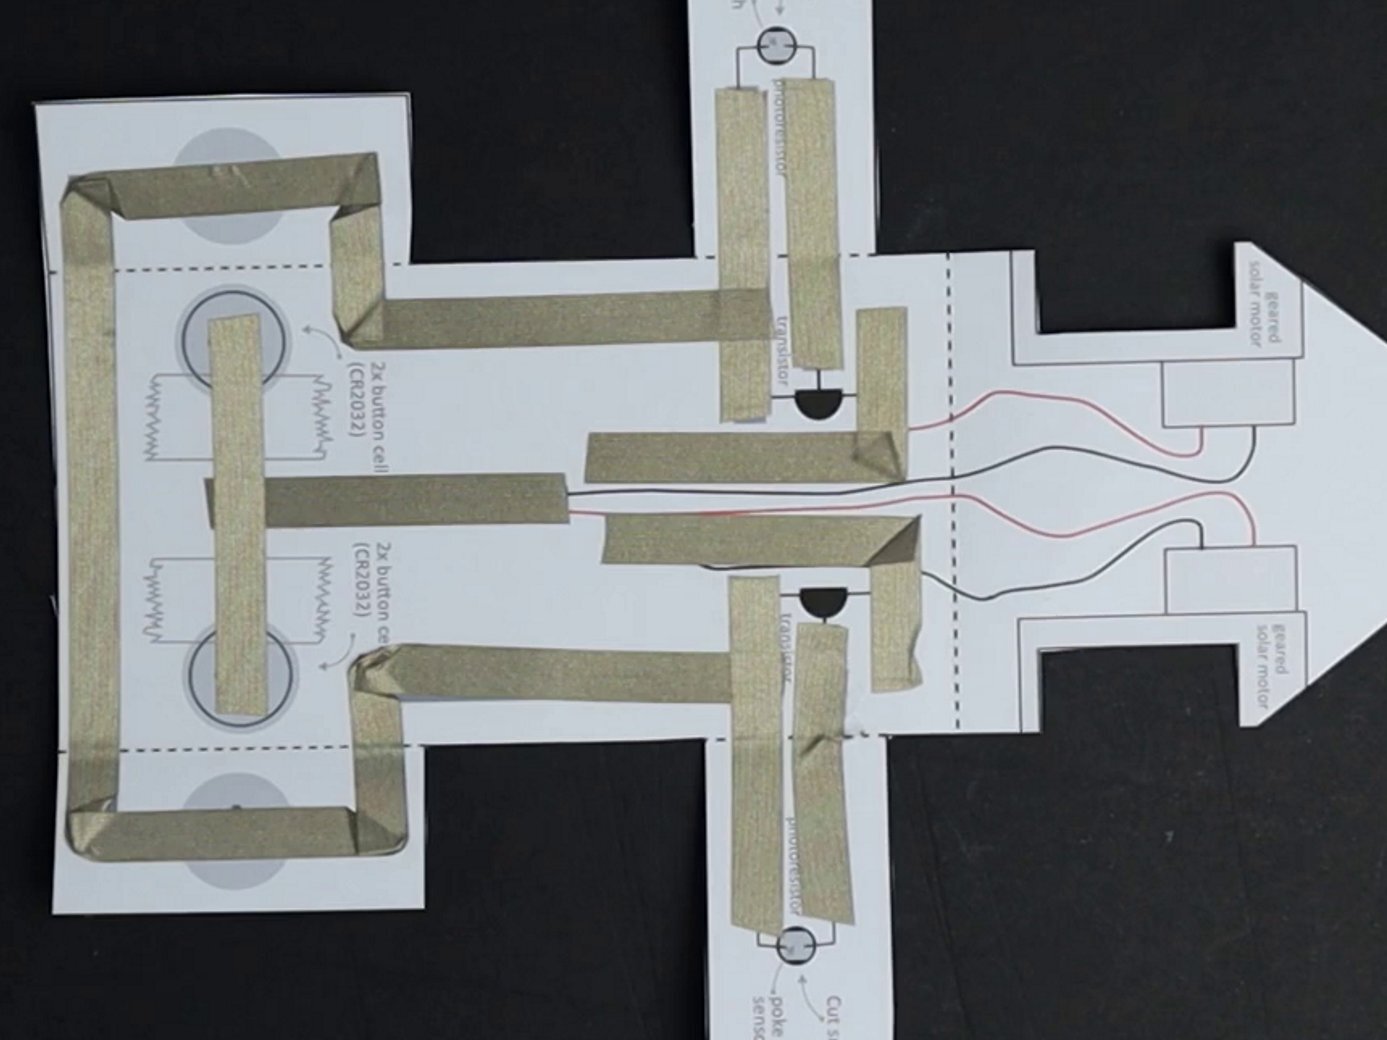
Trace all circuit tracks using conductive tape. Fold the tape around corners if necessary. For intersections, different tracks can simply overlap each other.
Attach the components
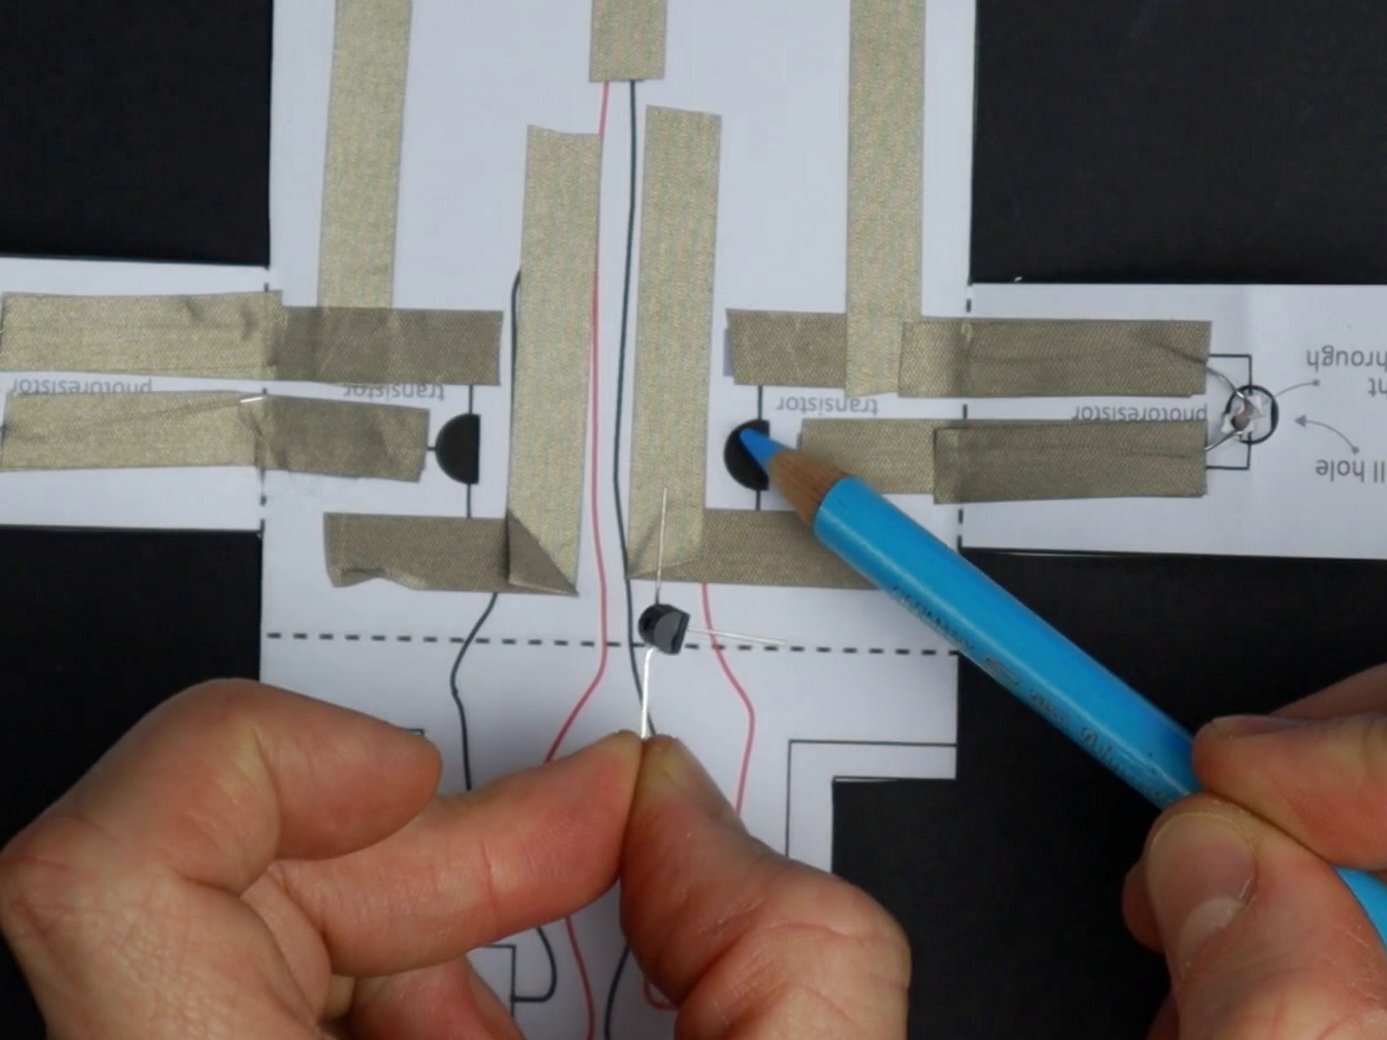
Attach two light sensors and two transistors as shown in the template. Use a short strip of conductive tape to attach the legs of the components to the circuit.
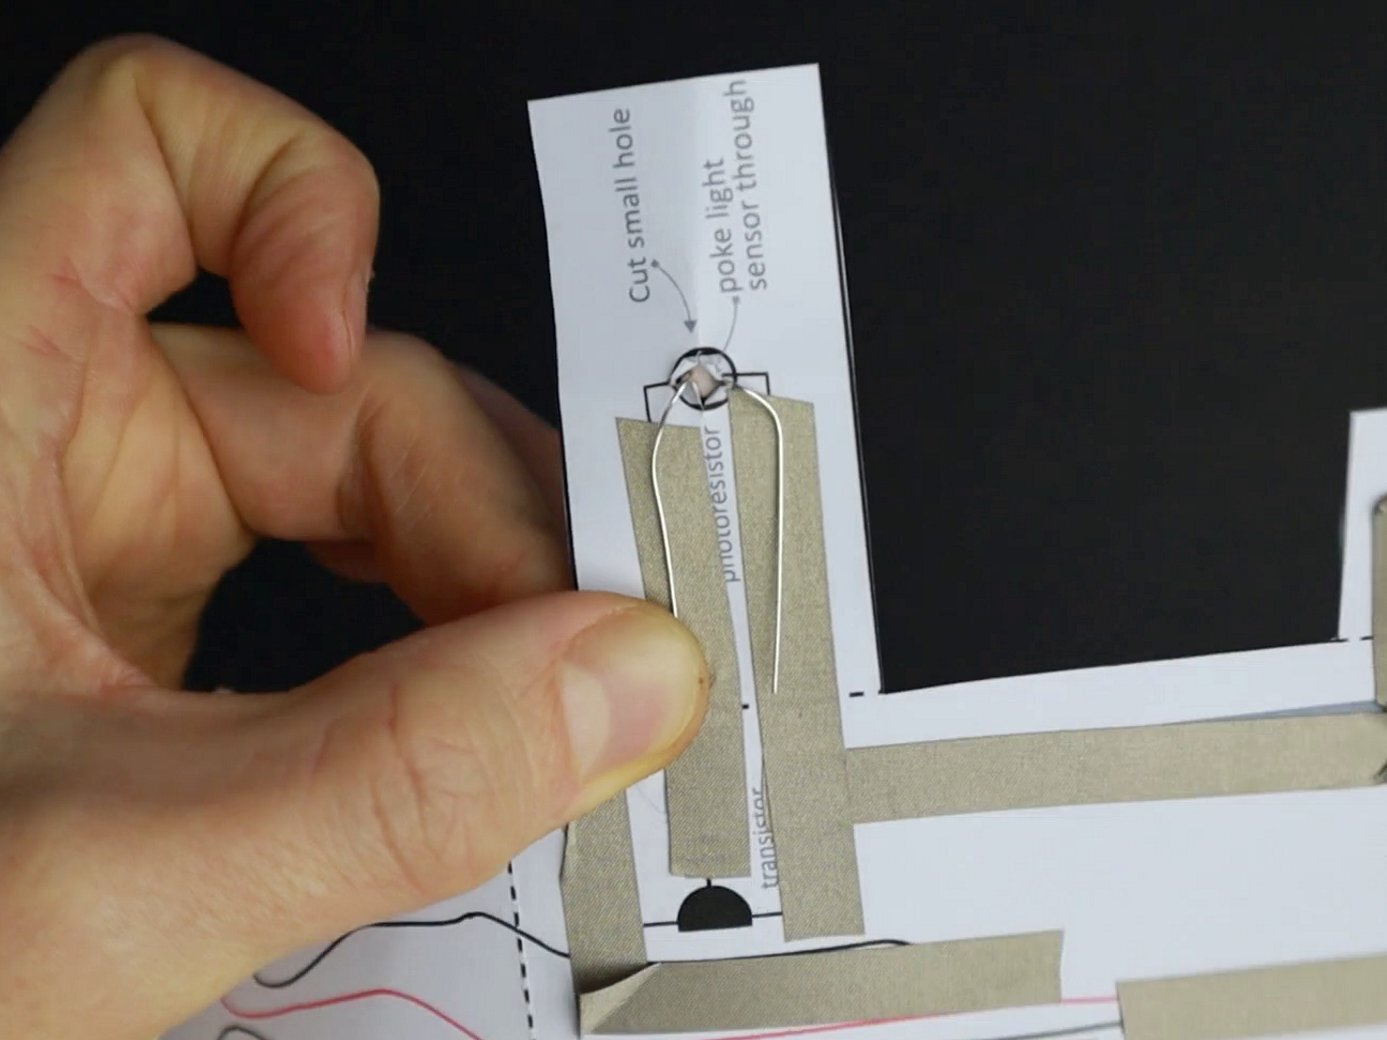
The details matter
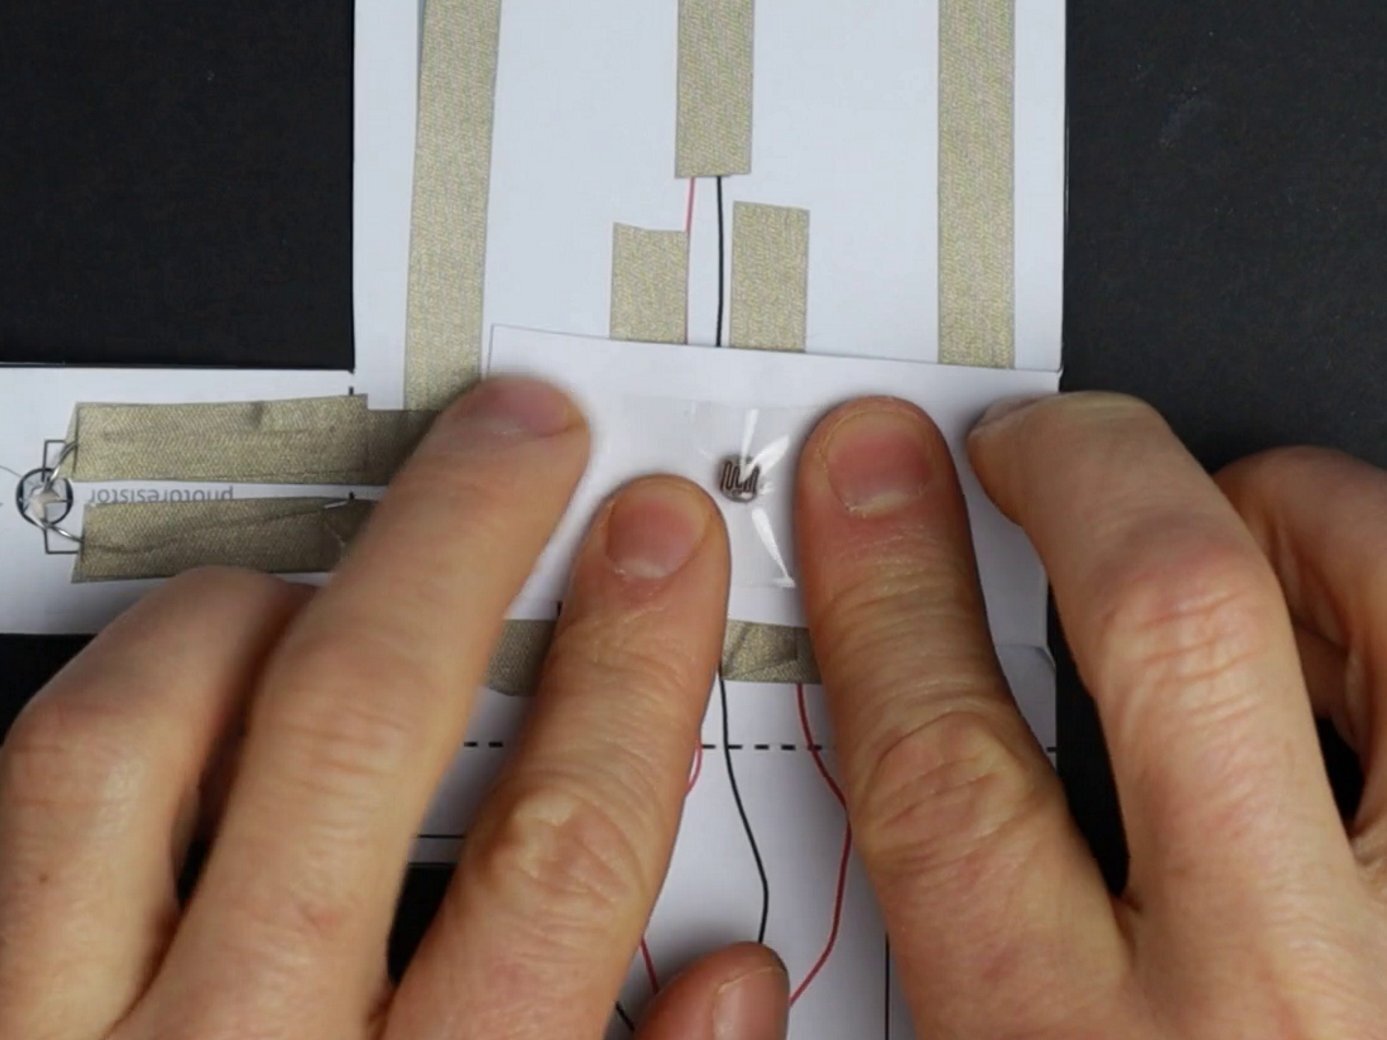
The light sensors have to be put through a hole so that the heads of the sensors look to the other side.
Make sure the round and flat side of the transistors are oriented as shown in the template.
Circuit tracks will be quite close to one another in some areas. Make sure they do not touch each other!
Add transparent tape to the light sensor's heads. They shouldn’t touch the smartphone screen directly.
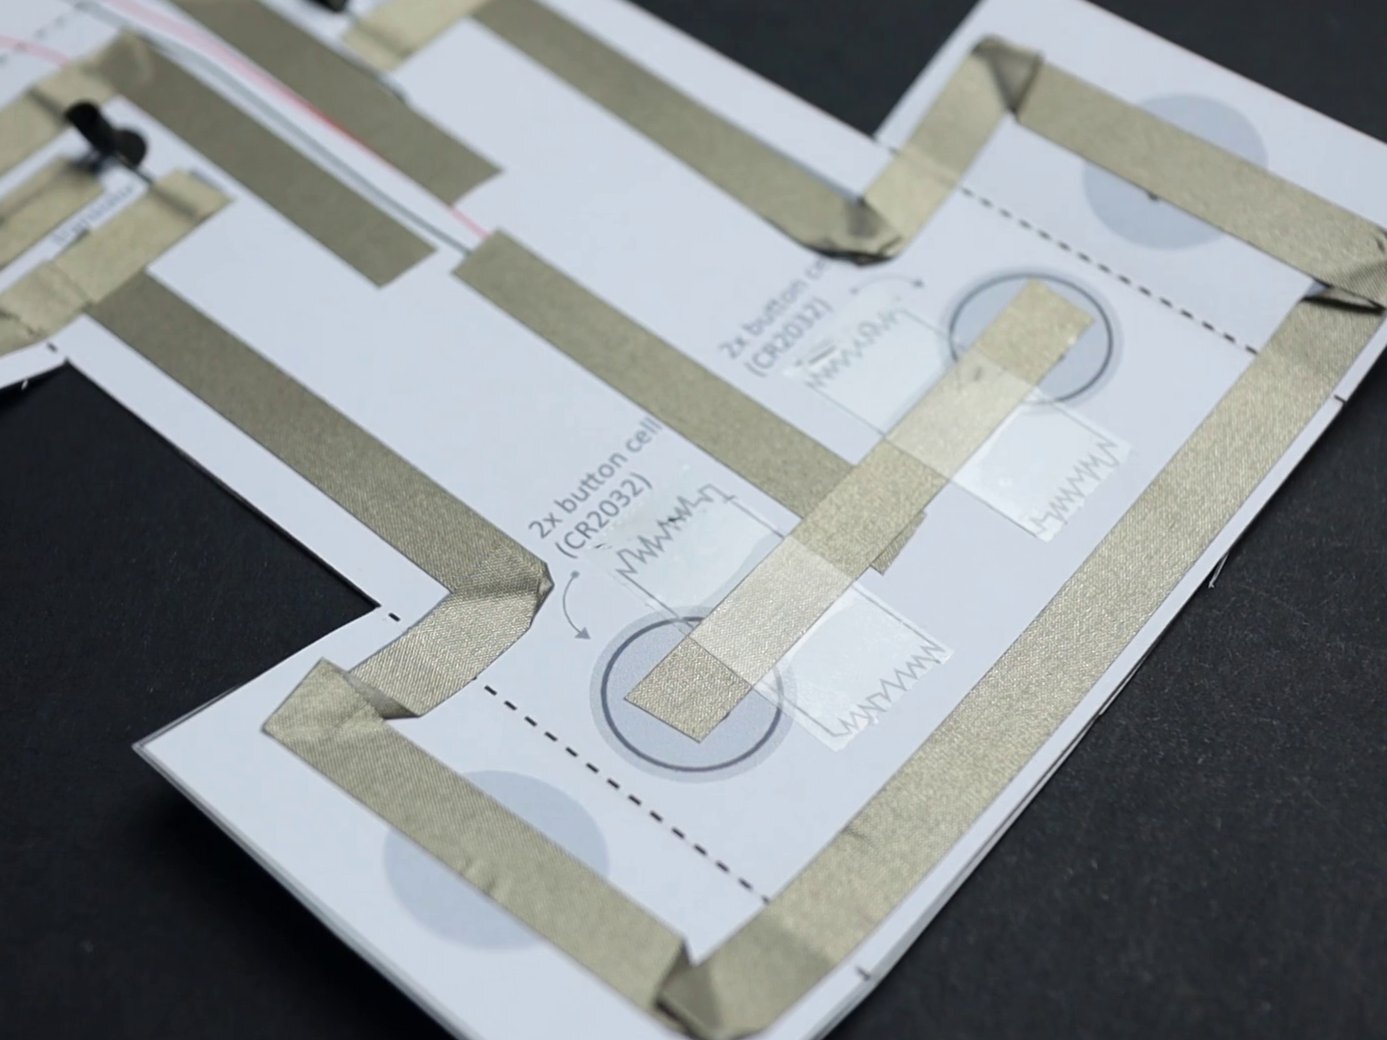
Also, stick strips of transparent tape at the battery holder where marked.
Step 3: Connect the circuit to the chassis
Attach circuit to the chassis
Now glue the new paper circuit to the back of the robot. When upgrading an Easy Robot you can cut the bottom part of the new circuit. The new circuit will cover the old circuit.
Attach the motors wires to the paper circuit
The wiring is shown in the template. Both motors need to be connected to the minus poles of the batteries and to one of the transistors. For one motor swap the black and the red wire, to change its rotation.
have the light sensors hold the smartphone
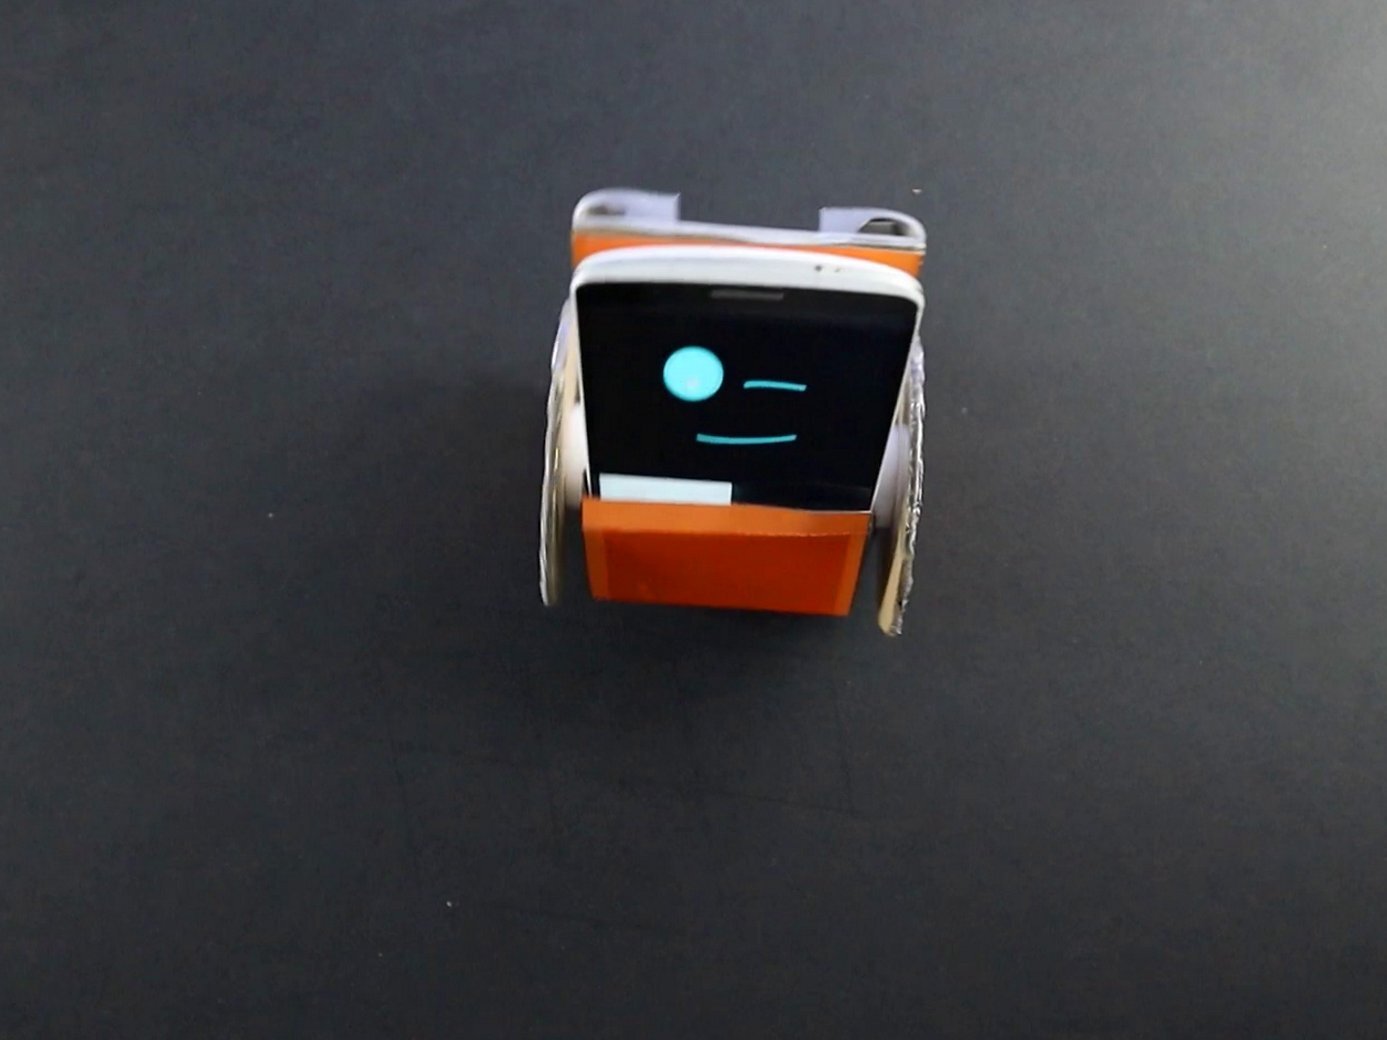
Put the smartphone in place. Fold your light sensors around it and attach both “arms” to each other with tape. Add a piece of cardboard to the bottom of the robot, to hold the smartphone in place.
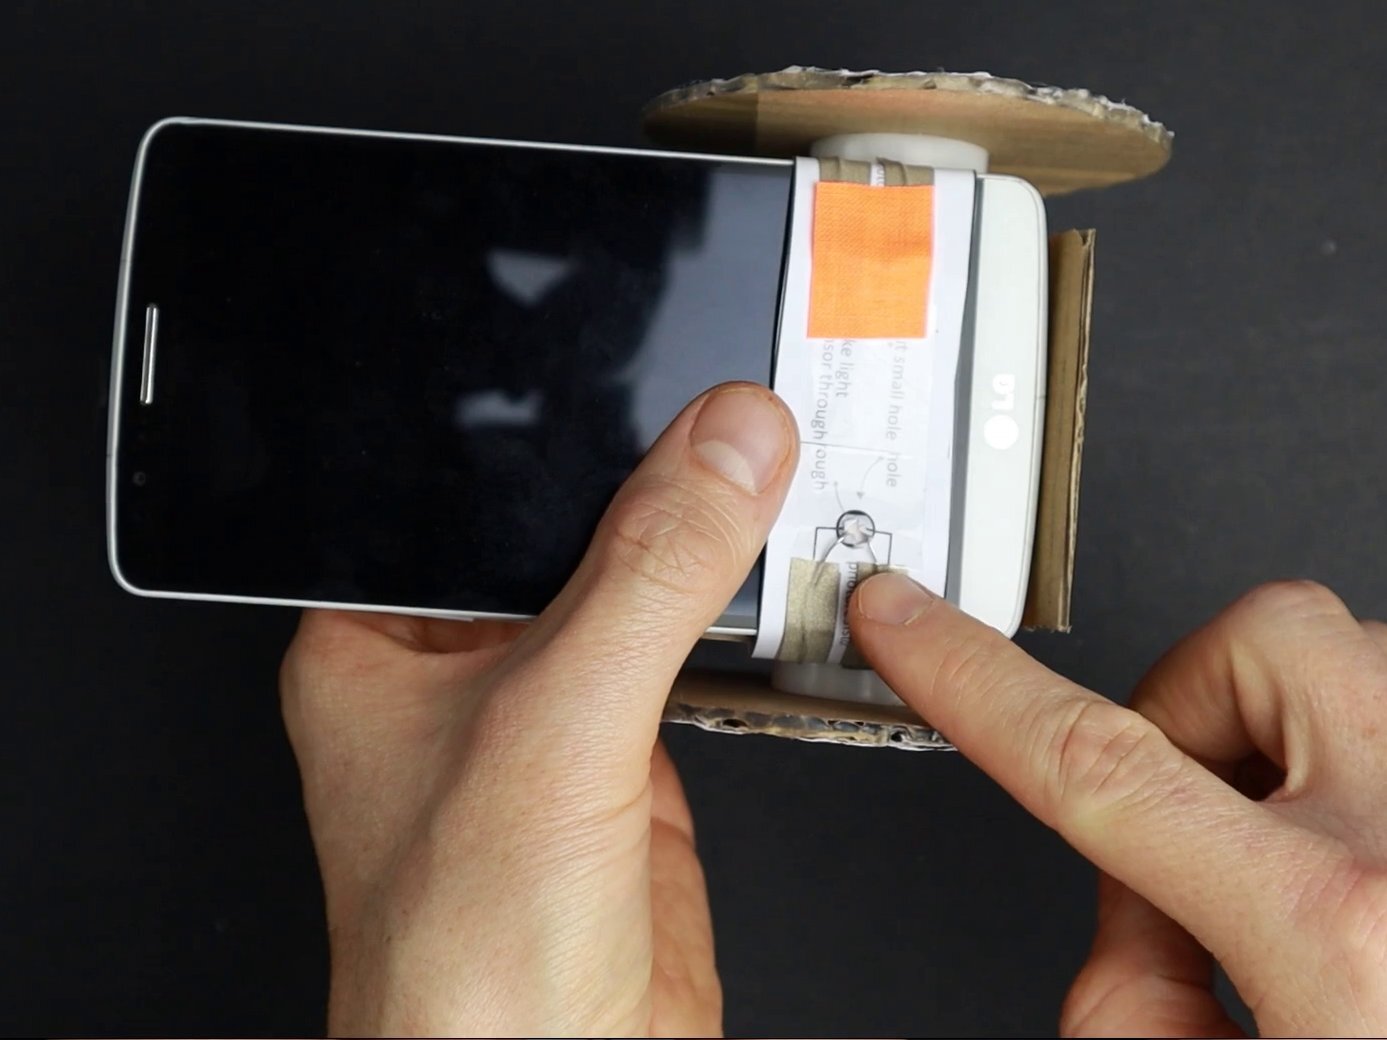
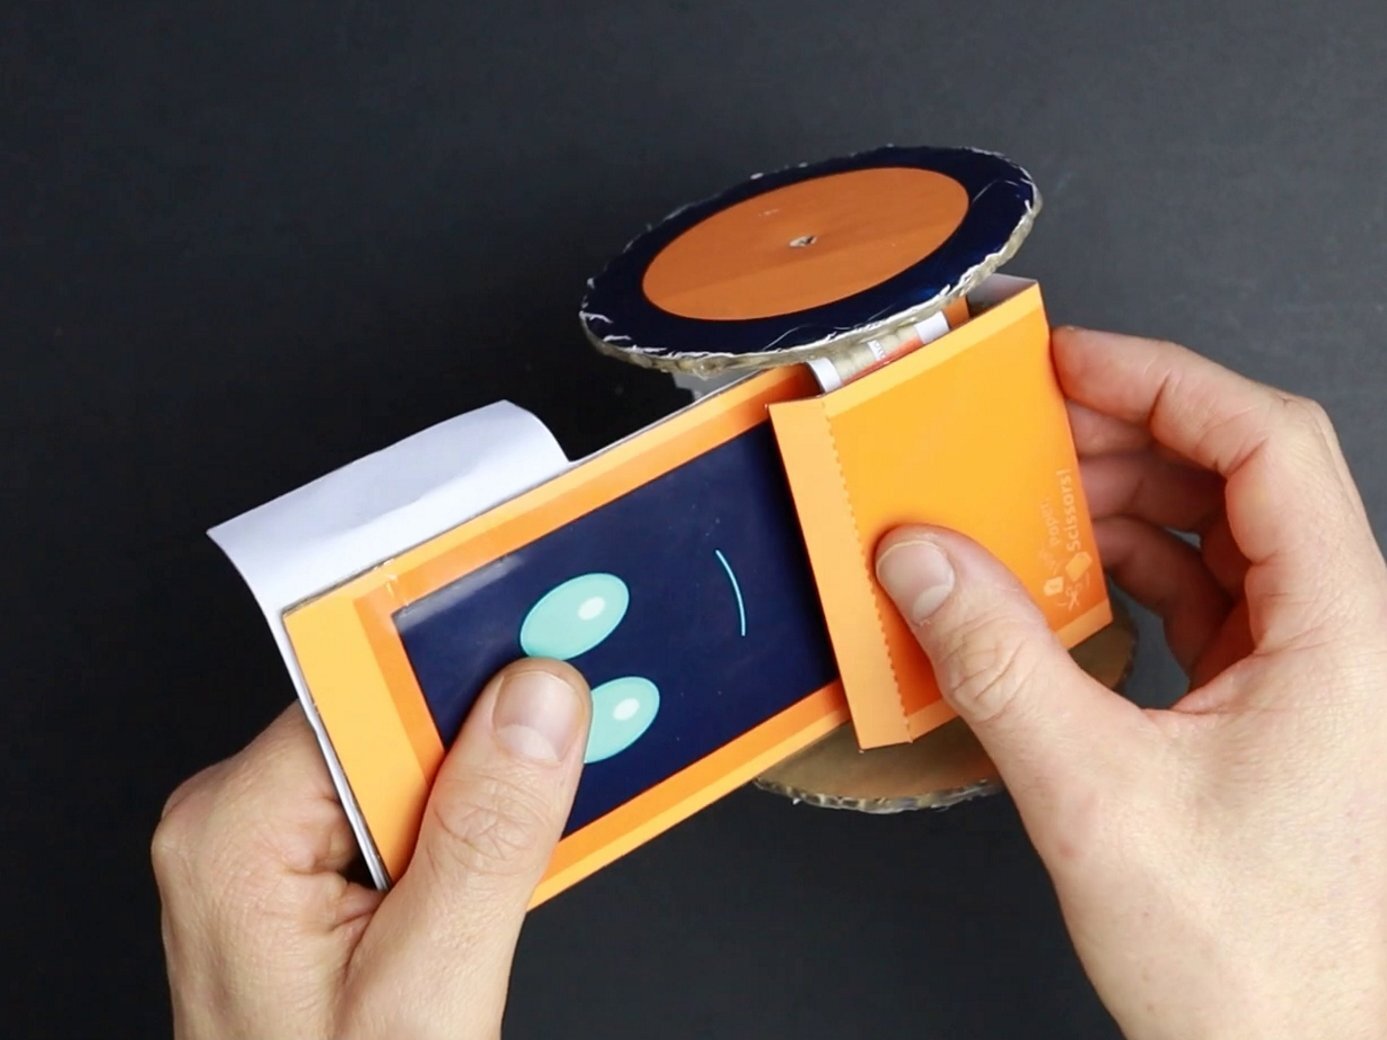
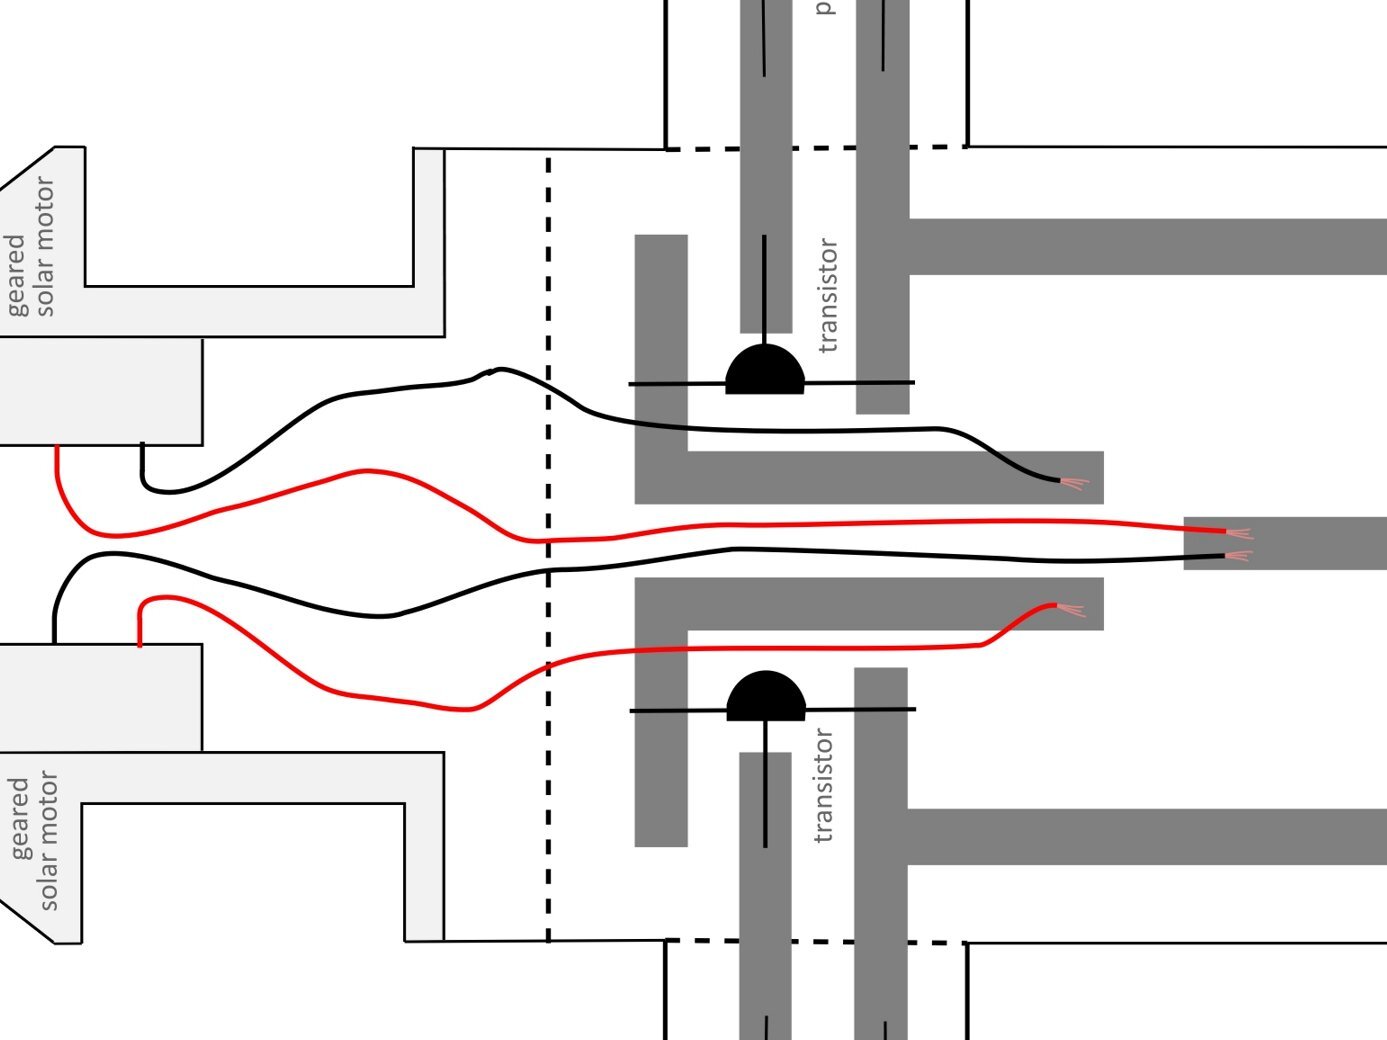
The details matter!
Add non transparent tape at the back of the light sensors to prevent light from outside to interfere with the sensors
Add the optional front cover to better cover the light sensors from the surrounding light.
To get the wiring of the motors right, check out the print template. It shows which wire has to go where.
Test Your Smartphone Robot
There will always be some trial-and-error!
For testing, download my sample video to your smartphone!
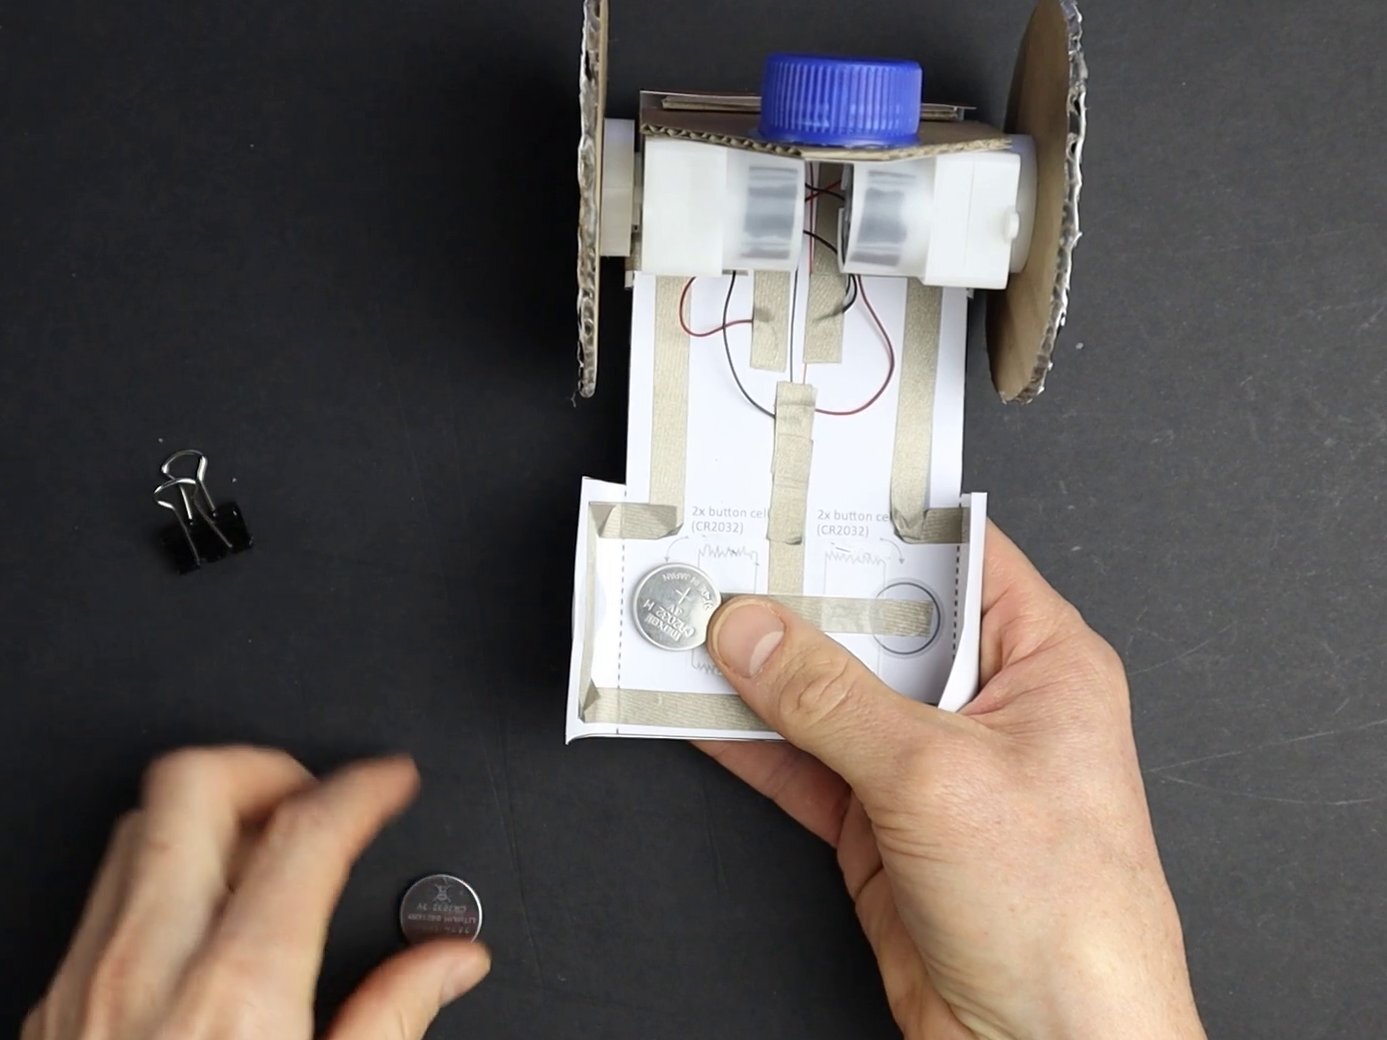
Power your Smartphone Robot
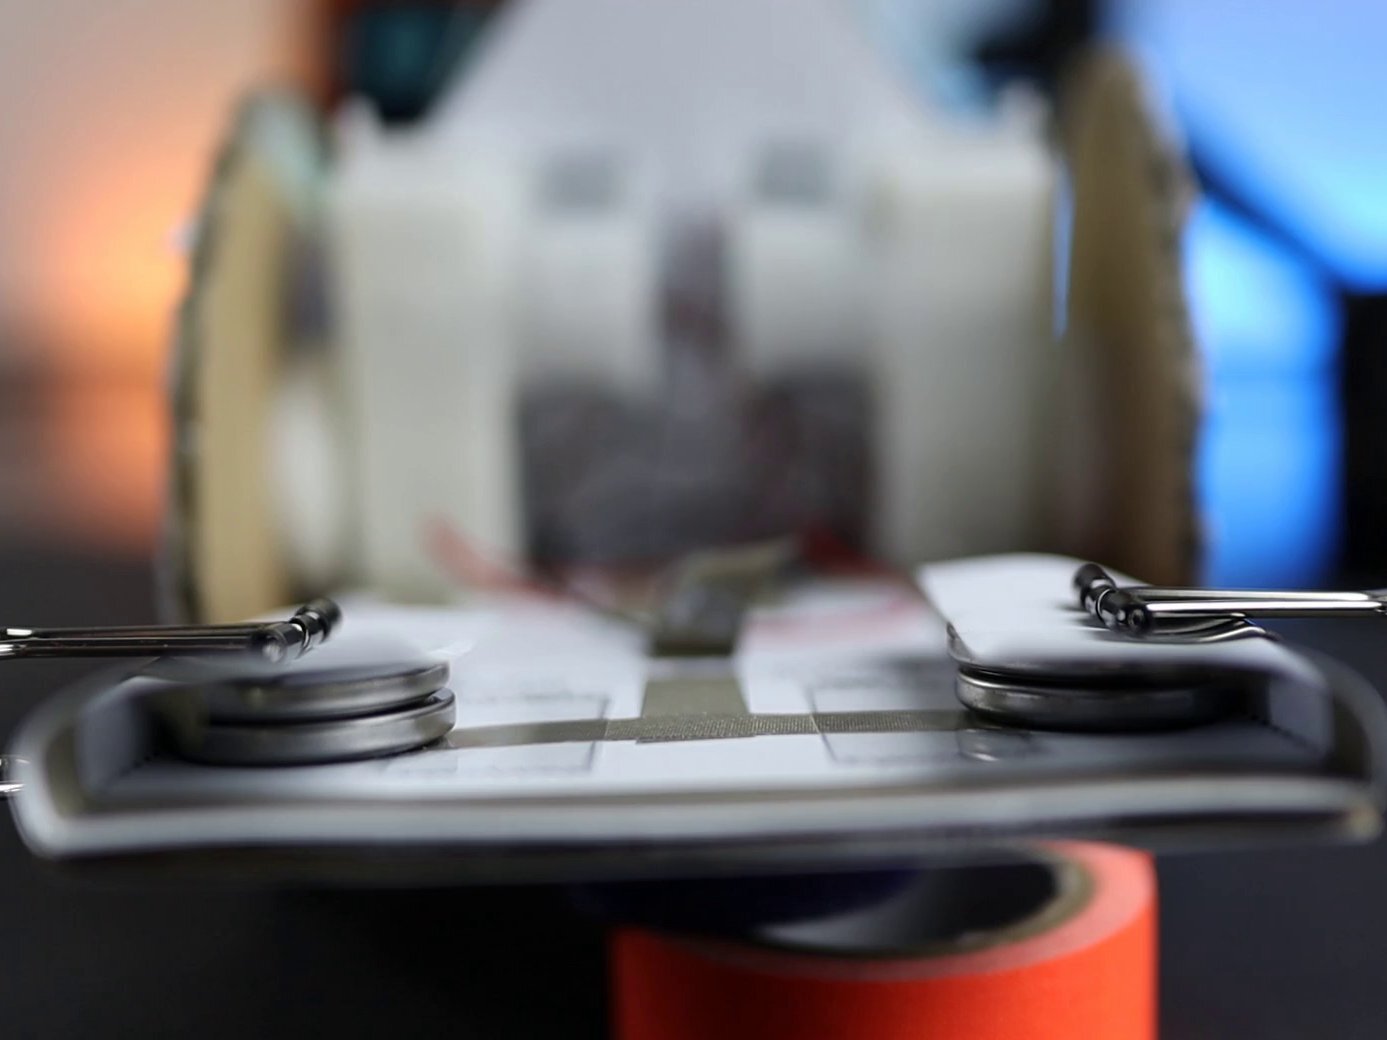
Attach two button cells to one side of the circuit with a binder clip. Stack them like shown in the template (minus poles pointing down). Then put the robot into bright light. The robot should start moving. If this works…
Insert the smartphone playing my test video on repeat. Now the robot should be controlled by the video. This will work best in a very dark room! If this works…
Attach another two batteries to the other side like shown in the template. All four minus poles pointing down. This is optional but it gives the robot more power.
Step 4: If something is not working
If your robot is not moving at all (with or without smartphone) ….
… Take it of the ground and see if the wheels can rotate freely.
… Check the batteries. Are they attached correctly (as shown in the template)?
... Check the paper circuit. Are there loose connections? Are tracks touching each other where they should not? Important: There might be a loose connection where the wires of the motors are connected to the conductive tape. Strip more of the wire’s insulation before attaching them with conductive tape to solve this!
If your robot (with smartphone) is driving but turning right or left is not working…
… maybe light from the outside interferes with the sensors. Test in a dark room.
… maybe light from the white rectangle gets reflected to the other sides light sensor. Glue a barrier (e.g. a rolled up piece of paper) between the two light sensors heads.
If your robot (with smartphone) isn’t stopping when it should stop…
… decrease the smartphone screens brightness.
…. go to a very dark room.
… make sure the light sensors are not receiving any light when the black rectangles are on screen.
If your robot is slow …
… that is OK as long as it works. The motors have a high transmission ratio. That makes the robot slow but powerful enough for our purpose. However, I experienced very slow motor rotation if the transistors are attached the wrong way (compare round and flat side with template). Turning around one transistor might be an interesting experiment for you.
If you want to speed up your robot…
… You can change the motors transmission ratio or increase the wheel size. I have talked about that in my Easy Robot Video.
… Other than that, it can help to increase the brightness of the smartphone screen.
Controlling Your Smartphone Robot
Program the robot by creating a stop motion video!
Using a Video for controlling the robot
This is optional and can be skipped to immediately start programming your smartphone robot with MIT App Inventor or any other programming language. However, I think this is a really nice way to teach kids the basic concepts of programming. If you want to try it, you will find all information in my video tutorial at the top.
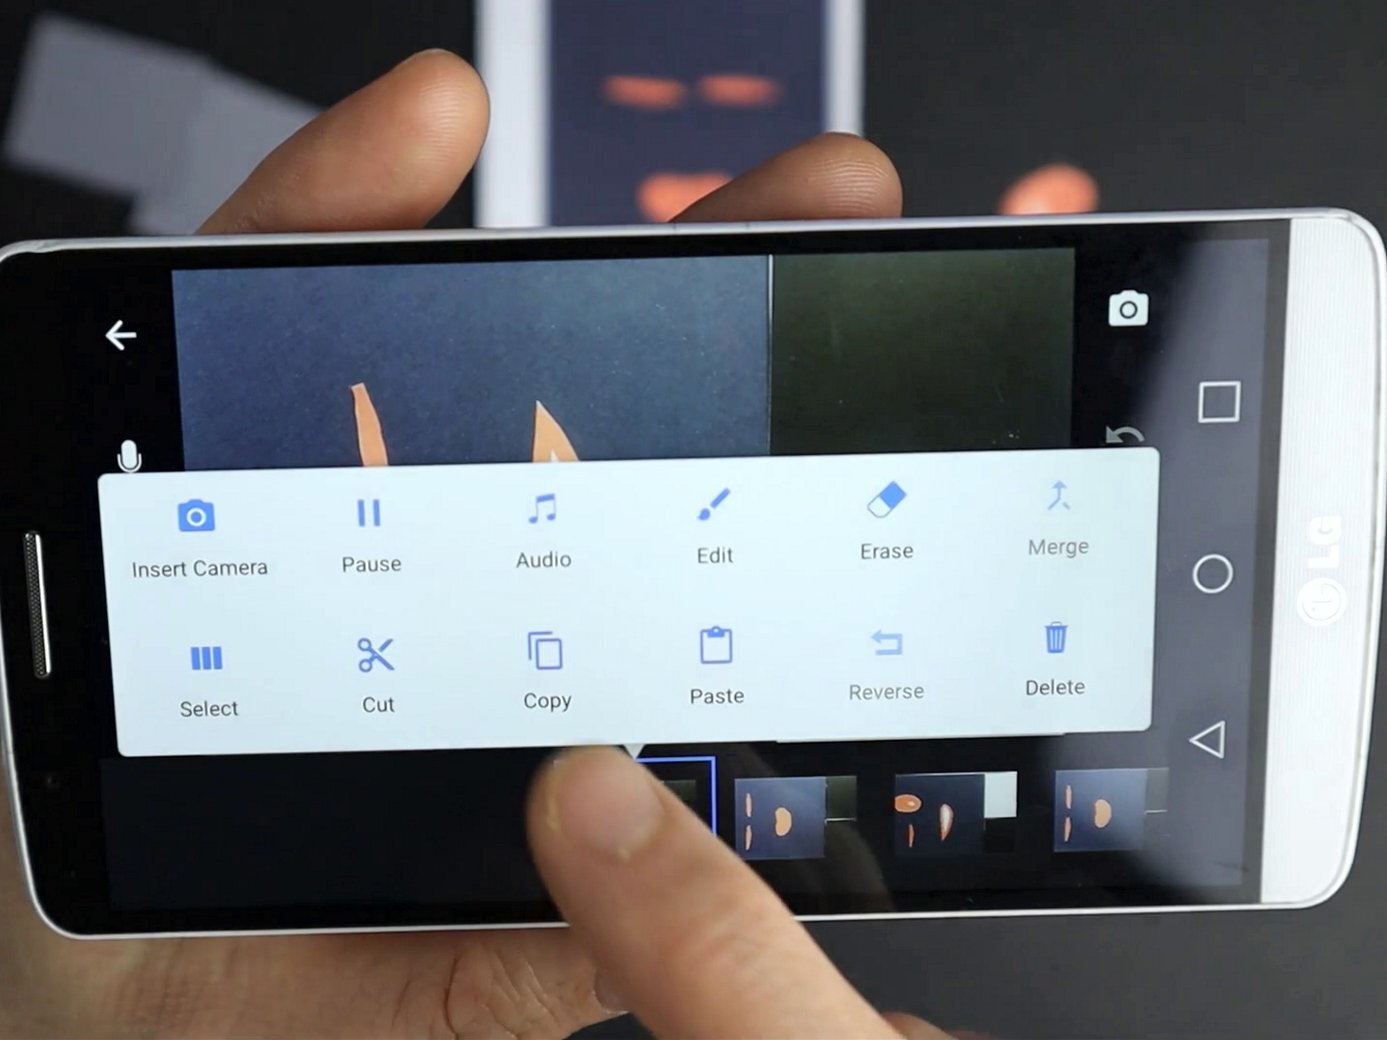
I use an app called Stop Motion Studio (App Store / Google Play). You will find a good introduction to this app here.
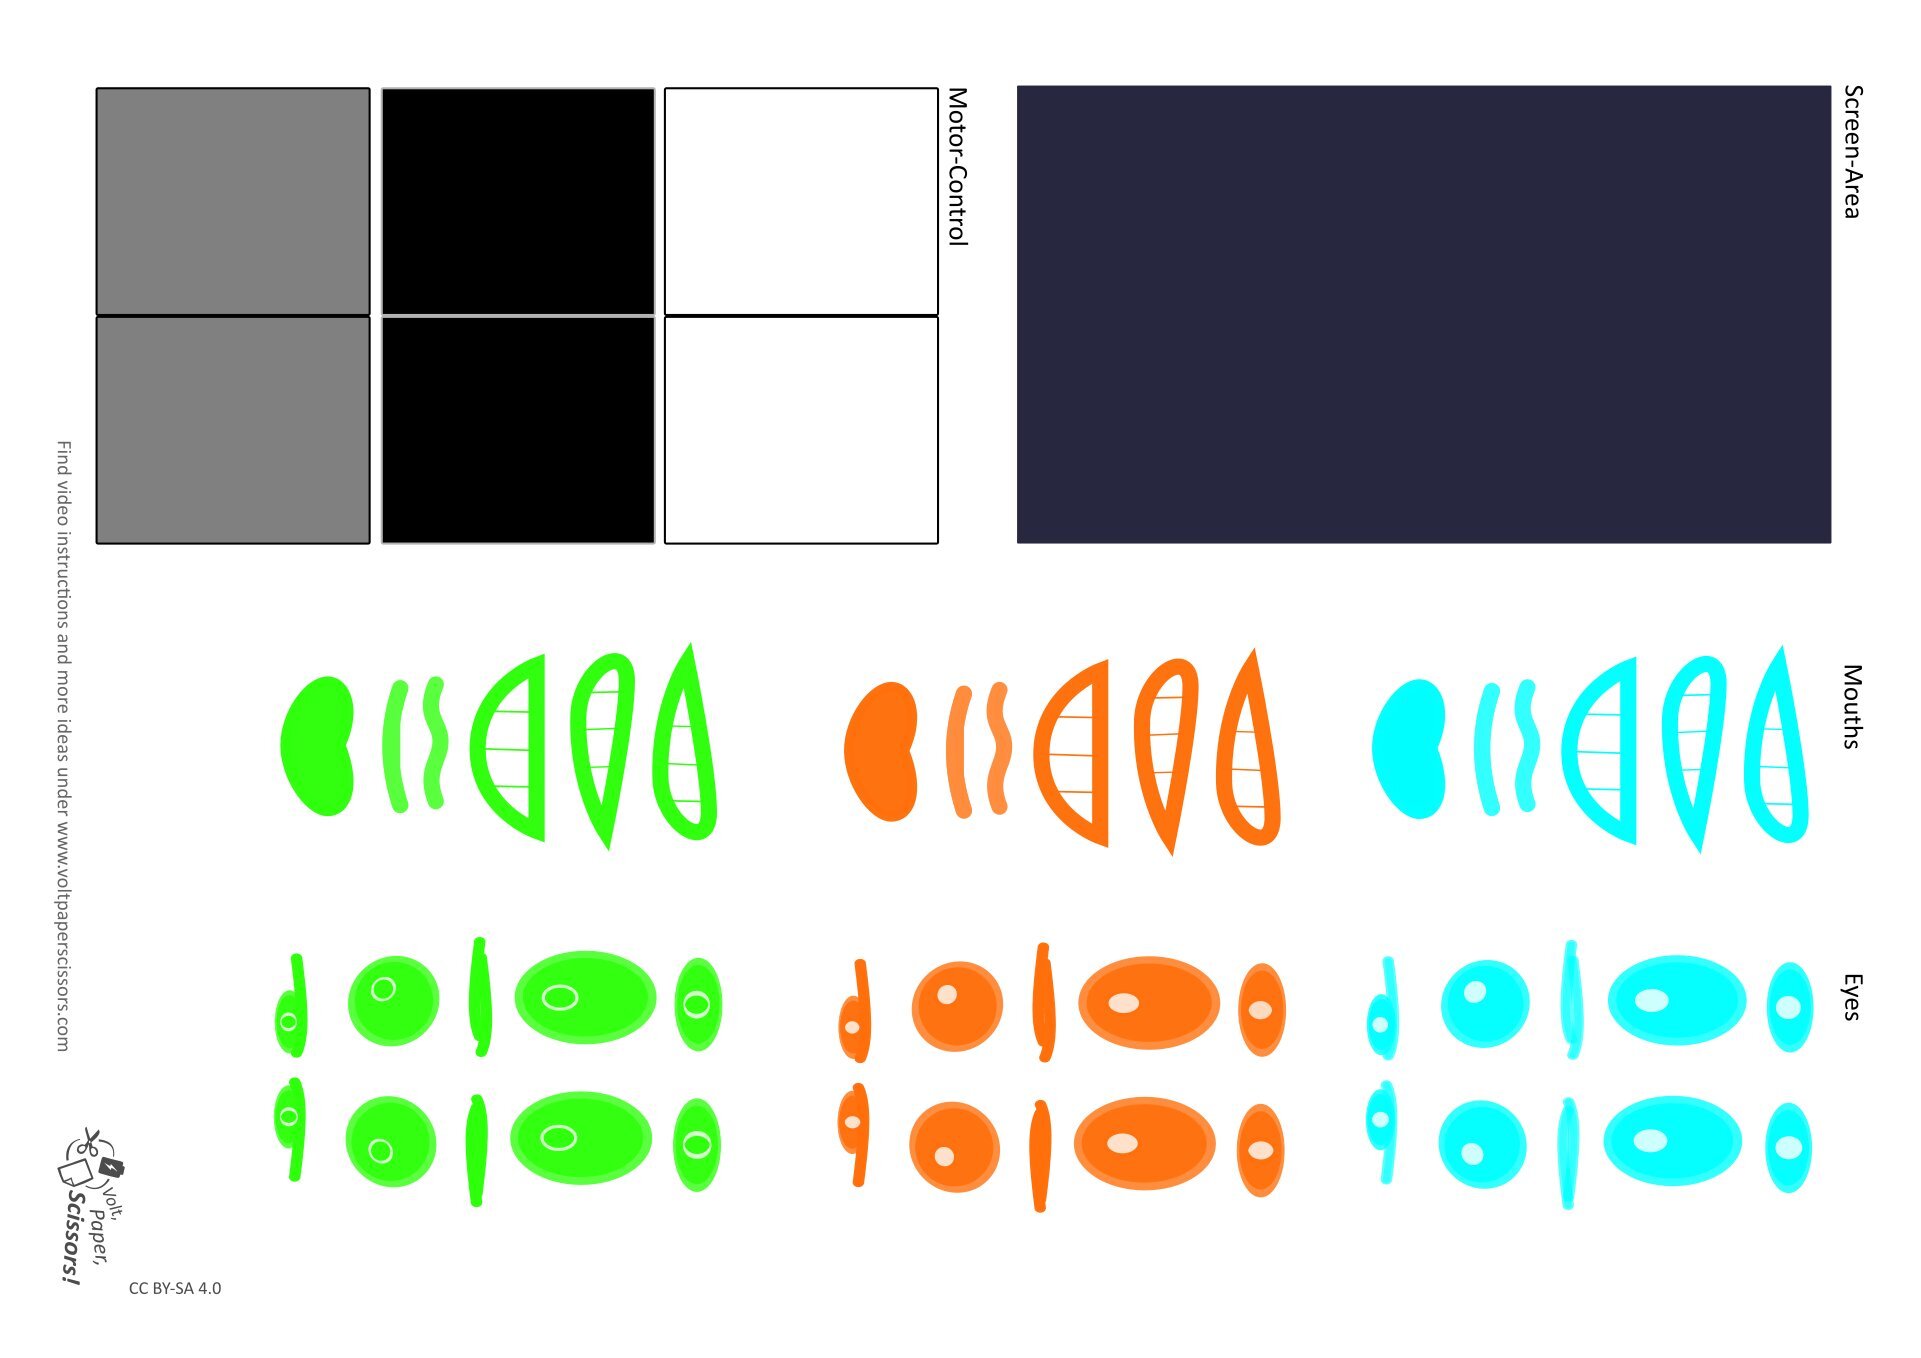
To start, download (free) my paper animation template.
Create a collage
Use my paper animation template to create different collages. Use the black and white rectangles for controlling the motors. Create facial expressions to give the robot character.
Use the Stop mOtion app to take Pictures
Using a stop motion app you can take pictures that later add up to a video. Take pictures for the following collages: move forward, stop, turn left and turn right.
Use stop motion video for controlling the robot
Once your animation is finished you can save it as a video and open it in your photo gallery app. Put the video on repeat. Test your robot in a dark room.
If something is not working
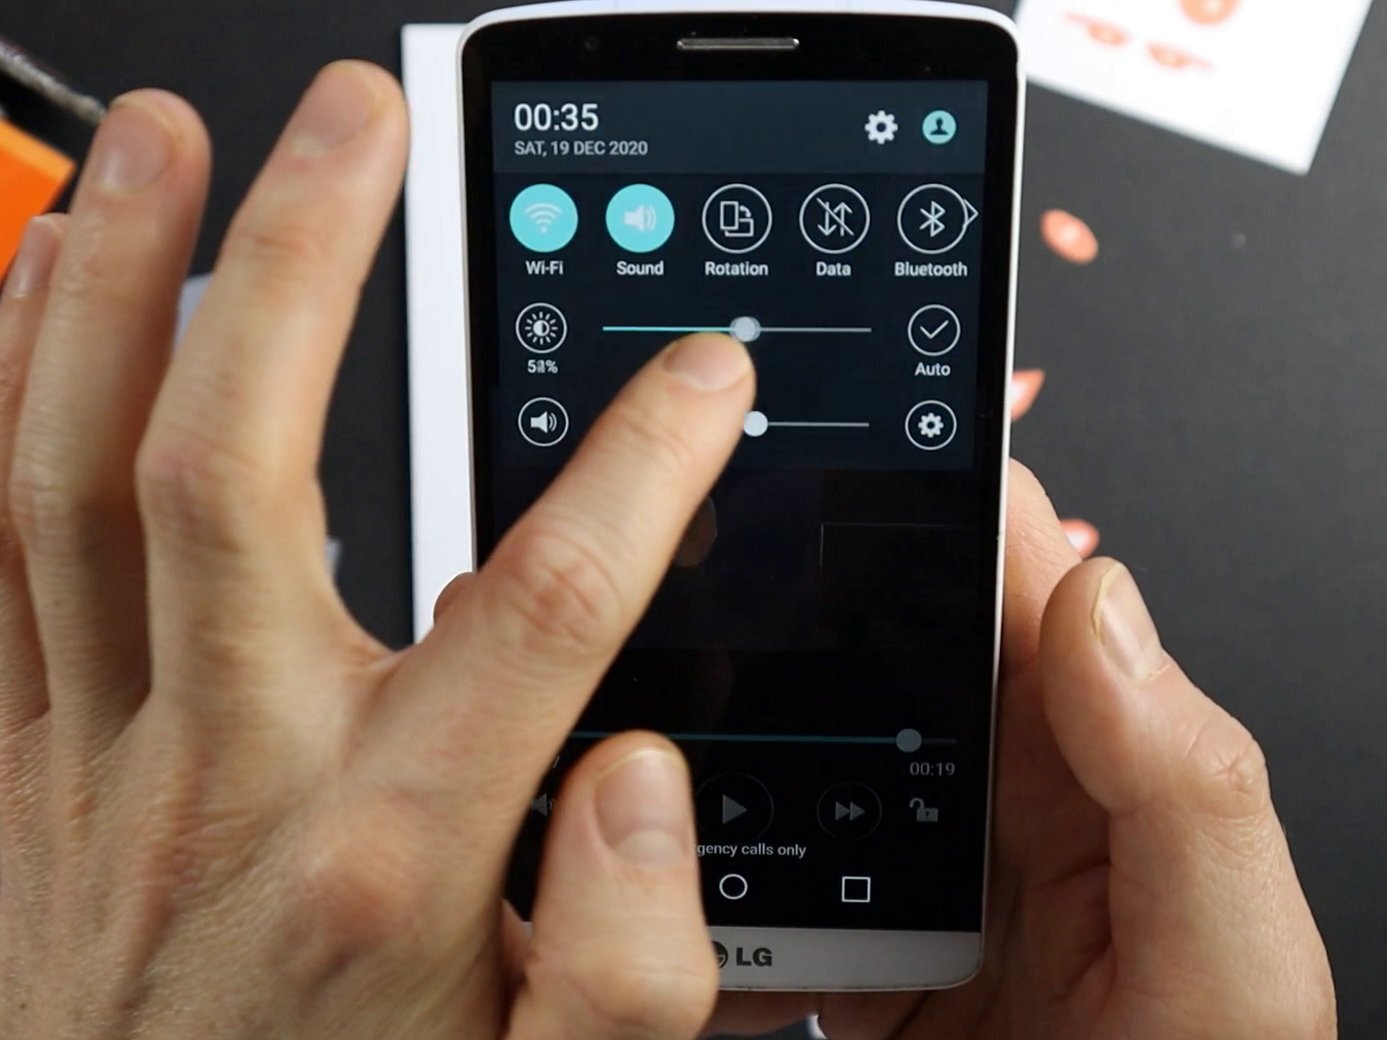
Note: This section only addresses problem with your stop motion video. I will assume that the robot is working fine with my sample video.
If the turning (go left / go right) is not working….
… decrease the brightness of the screen. Only a very dark black will completely stop the motor.
If driving works but the robot does not stop….
… decrease the brightness of the screen (same problem as above). Only a very dark black will completely stop the motor.
if the robot is slower than with my sample video …
… increase the brightness of the screen.
Tips for your stop motion video
Set the frame rate in the options menu to 1 frame per second.
Touch any picture and use the copy/cut/paste commands to move pictures around.
Repeat pictures a few times in a row to give the robot more time for driving (1 picture = 1 second of driving)
Adjust the brightness of the screen until the black rectangles stop the motors while the white rectangles start the motors.
Two Tips
Pimp your Smartphone Robot!
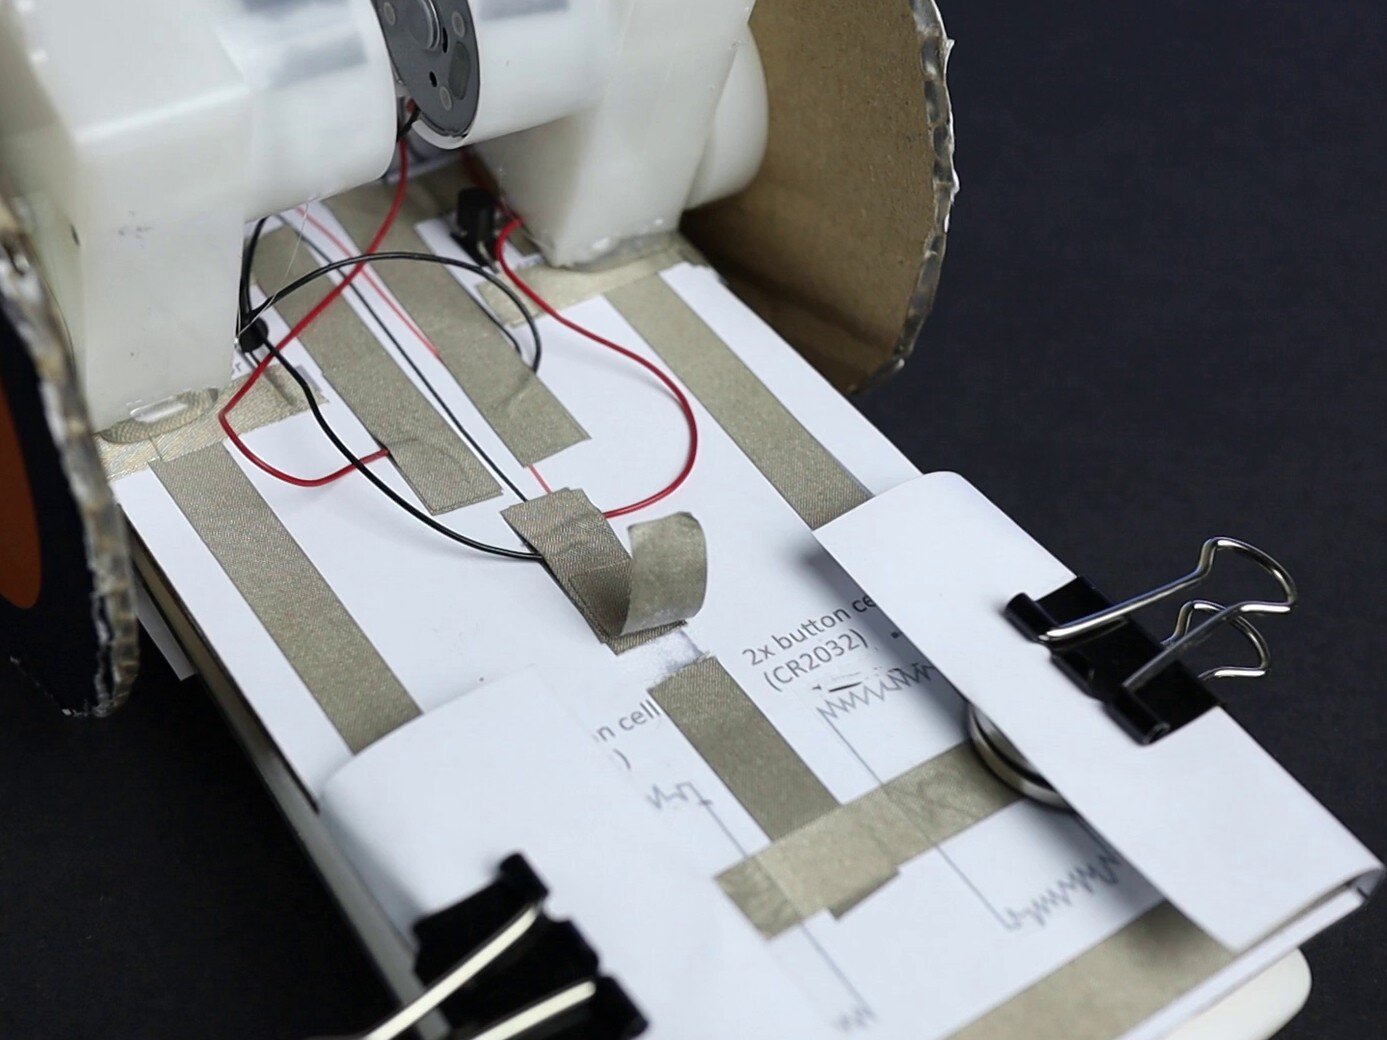
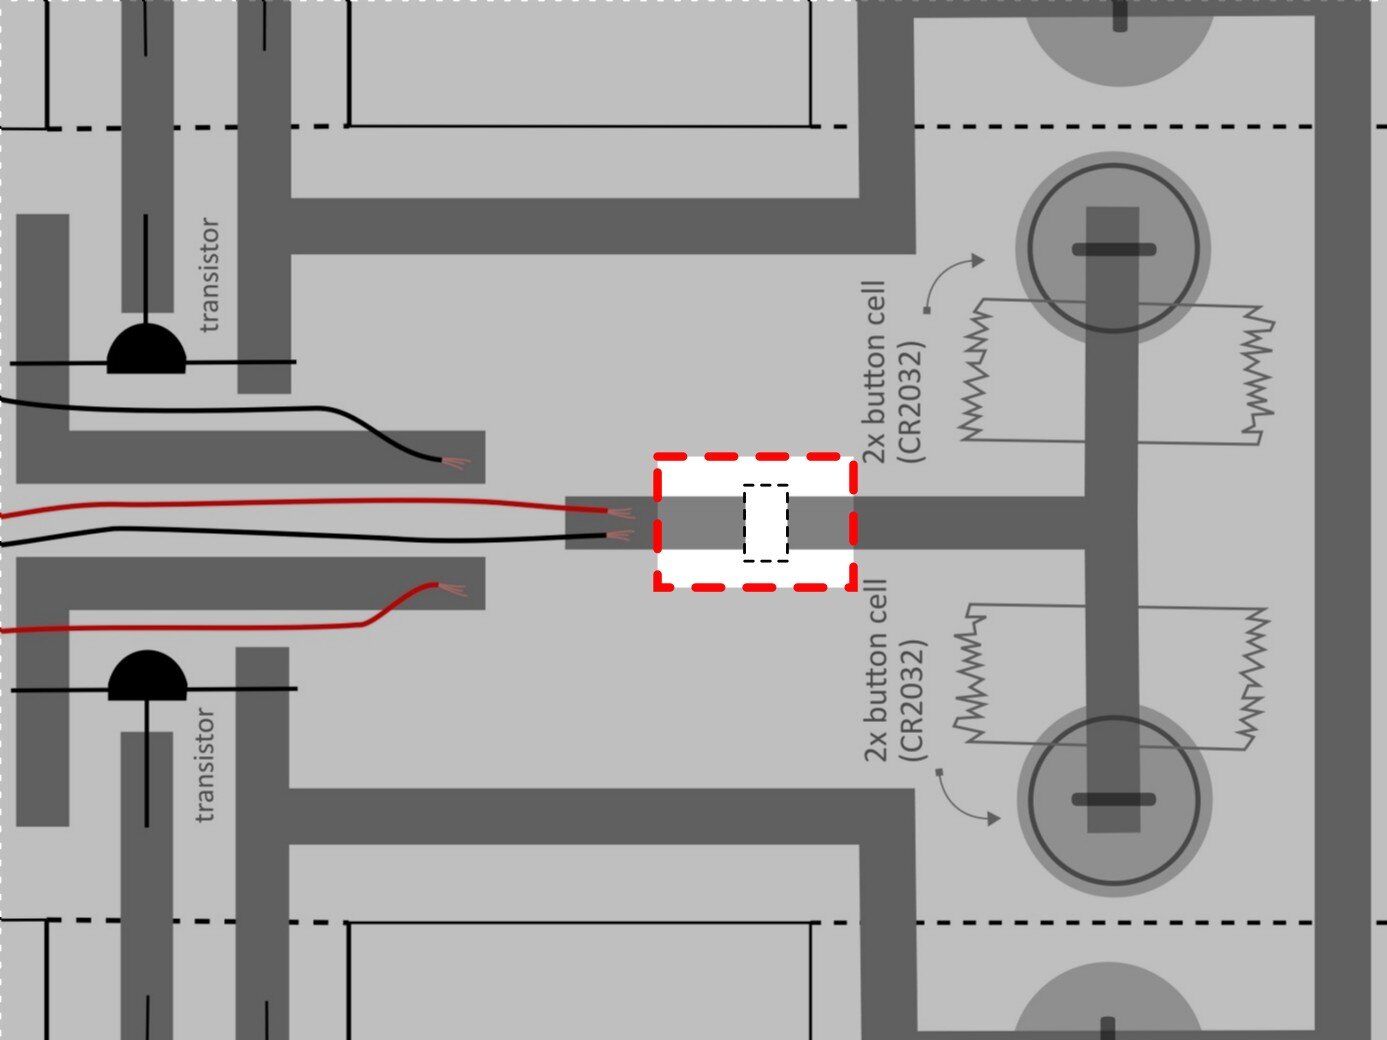
Add an on/off switch to the circuit
At the middle track, you can add a little on/off switch by making a gap and then bridging it with a short strip of conductive tape. To turn the switch off you simply detach the strip.
Make a body for your robot from paper
If you want you can create a cool body for your robot. All you need is the printed template, scissors, and glue. Since it is the same body I used for my Easy Robot, you can use the same template and follow my Easy Robot tutorial.
Programming Your Smartphone Robot
Use MIT App Inventor to make your robot move, speak or listen to voice commands!
Note: I am working on a series of tutorials on how to use MIT app inventor to program the smartphone robot. You will find all tutorials on my DIY Robotics Platform page.
Planned MIT App Inventor tutorials:
Introduction to MIT app inventor and how to use it to program the smartphone robot. (Two Parts)
How to add gestures to your robot.
How to make your robot talk and listen to voice commands.
How to use another smartphone for remote controlling.
And much, much more….
This work is licensed under a Creative Commons Attribution-NonCommercial-ShareAlike 4.0 International License.
If you want to use my work commercially, write me an e-mail.
If you use or share my work, please attribute VoltPaperScissors.com as the creator of this work and provide a clickable link where possible.
Find more information about me, my project, and the license I use here.


